This post contains affiliate links, which means I may earn a commission if you purchase through those links (at no extra cost to you).
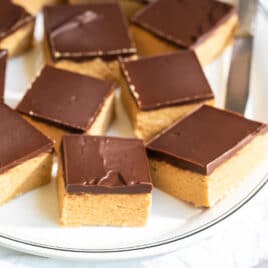
People go wild for these No-Bake Peanut Butter Bars! They only take 5 ingredients and 10 minutes (plus chilling time) to make, and they take just seconds to disappear. This is my grandma’s recipe which she dubbed “Almost Reese’s.”
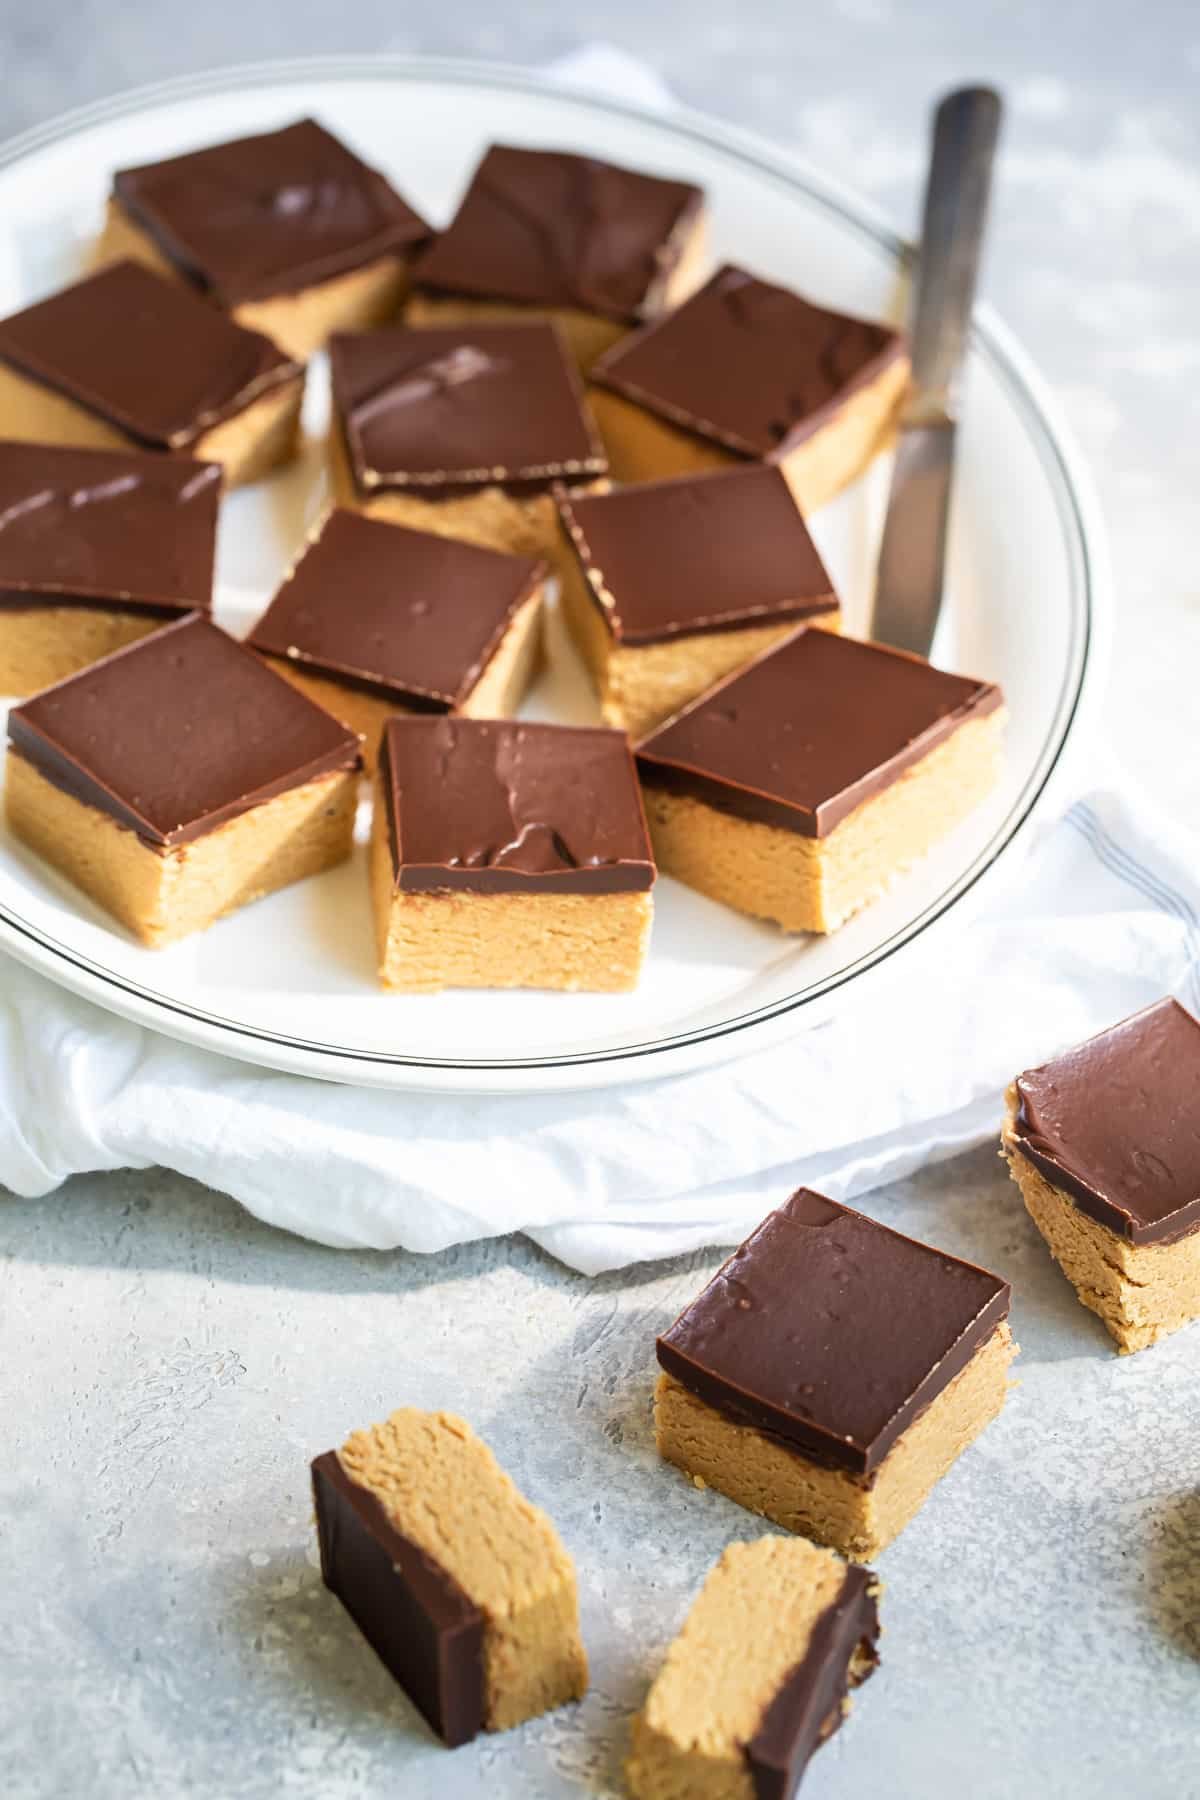
These no-bake peanut butter bars are a must-make for anyone who loves the timeless combination of chocolate and peanut butter.
I’ve had this recipe on my site for years, and it’s always been popular. The only issue is, some readers complained the peanut butter mixture was “grainy” if the brown sugar didn’t dissolve properly in the melted butter.
We reworked the recipe and swapped out all the brown sugar for an equal amount of graham cracker crumbs. I personally think it’s better (sorry grandma!) and there are no issues with graininess anymore. I hope you love it! And if you like the old way better, you can continue to 1 ½ cups brown sugar instead of the graham cracker crumbs.
Table of Contents
Recipe ingredients
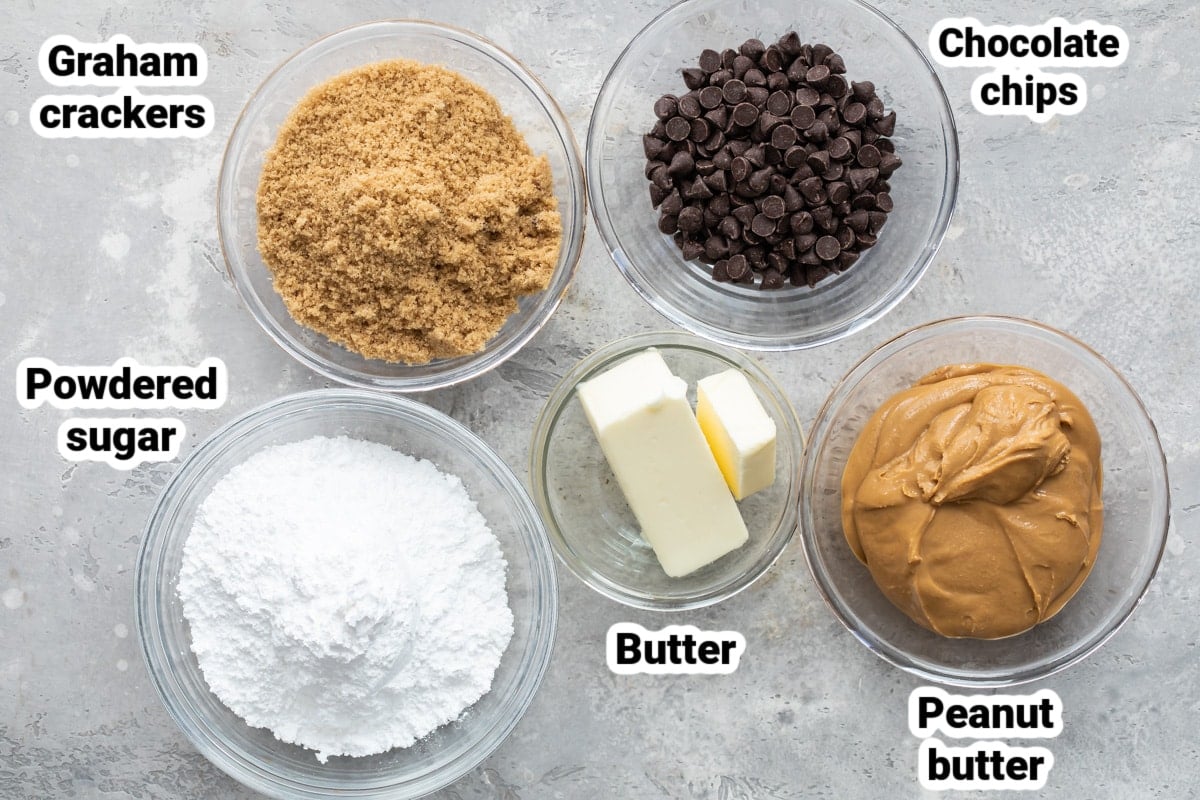
At a Glance: Here is a quick snapshot of what ingredients are in this recipe.
Please see the recipe card below for specific quantities.
Ingredient notes
- Butter: Cold butter usually softens up in about 30 minutes when left out at room temperature (much longer if frozen). To soften butter in the microwave, cut each stick of butter in half, unwrap, and place on a microwave-safe plate. Then cook the butter at 10% power (that’s ten percent!) for 1 minute. Afterward, gently press on the butter with your finger. If still too firm, cook for another 40 seconds at 10% power.
- Graham cracker crumbs: The original version of this recipe was prone to grittiness (the brown sugar would not always dissolve completely in the melted butter). To fix this issue, we updated the recipe to use graham cracker crumbs instead of brown sugar, and it’s fabulous. But if you miss the old way, just substitute an equal amount of brown sugar for the graham cracker crumbs.
- Peanut butter: I use store-bought peanut butter for this recipe, and Skippy is my favorite brand.
- Chocolate: I like regular semi-sweet chocolate chips, but you can use milk chocolate if you prefer that.
Step-by-step instructions
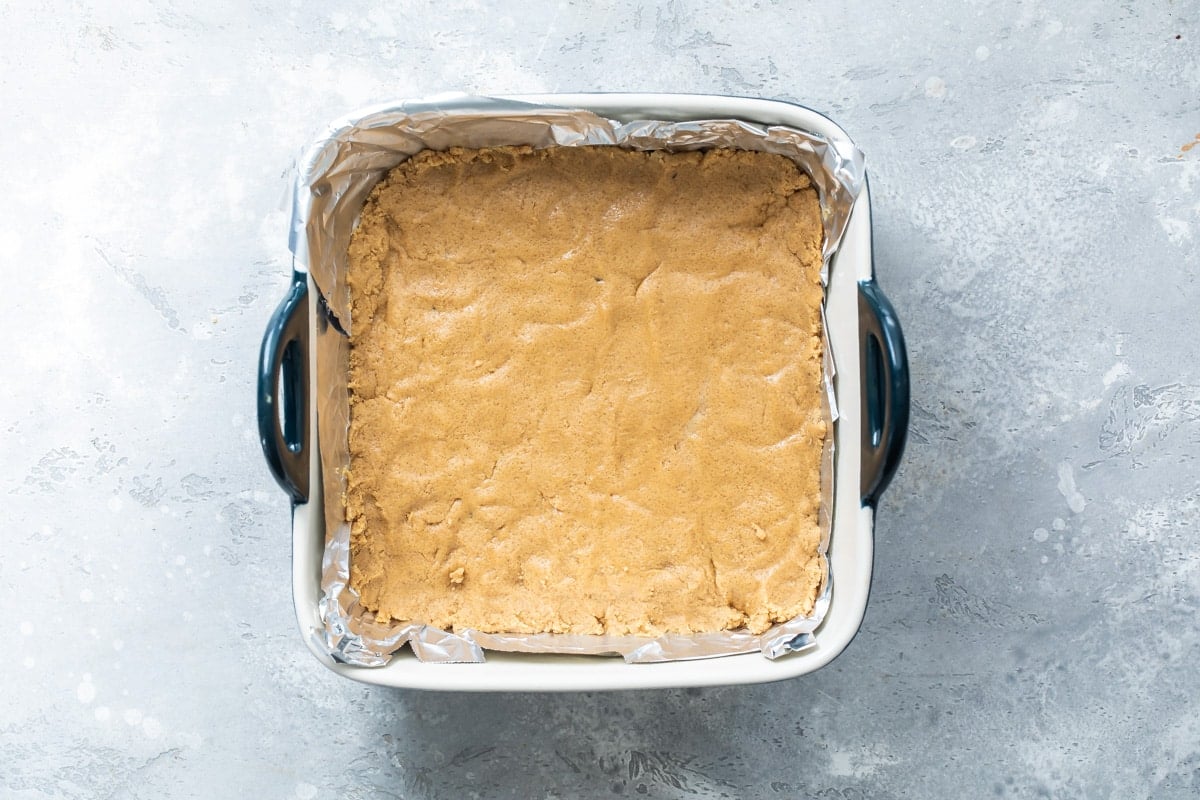
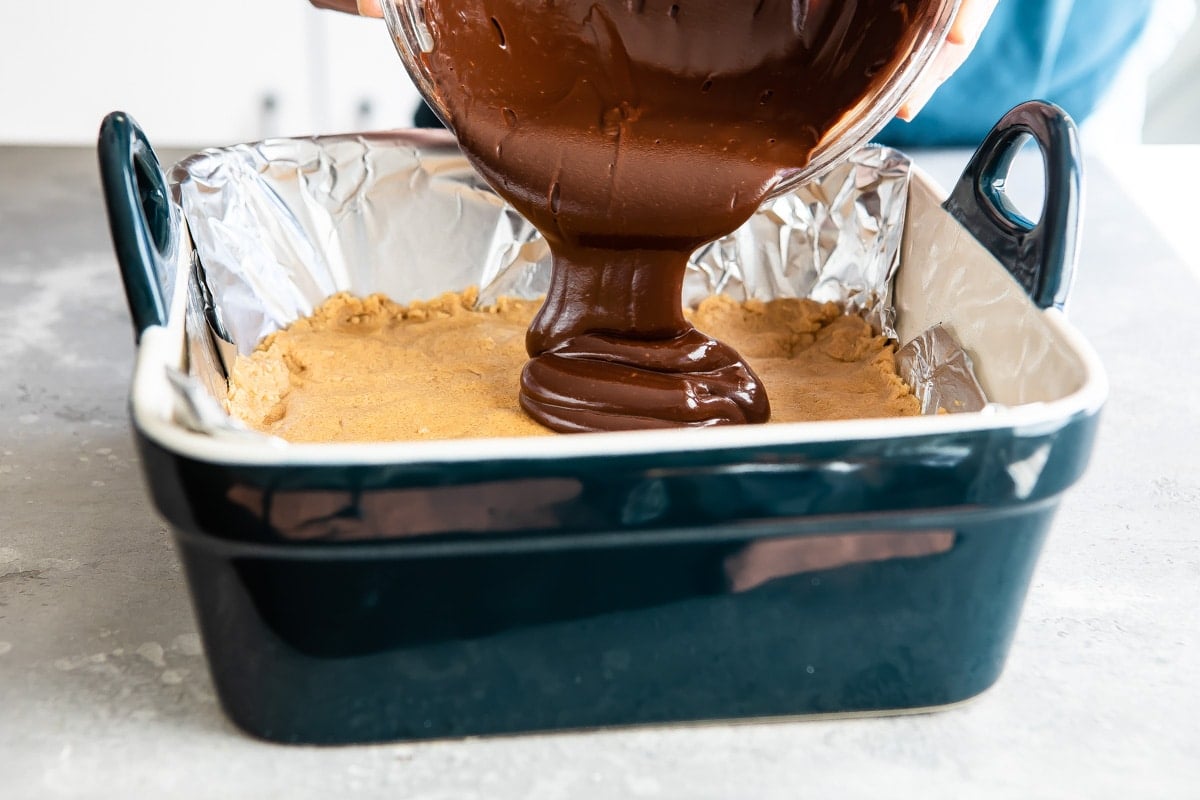
- Line an 8-inch or 9-inch square baking pan with a foil sling for easy cleanup and coat with nonstick spray. In a large bowl, cream 5 tablespoons butter, graham crackers, and powdered sugar until smooth. Stir in peanut butter.
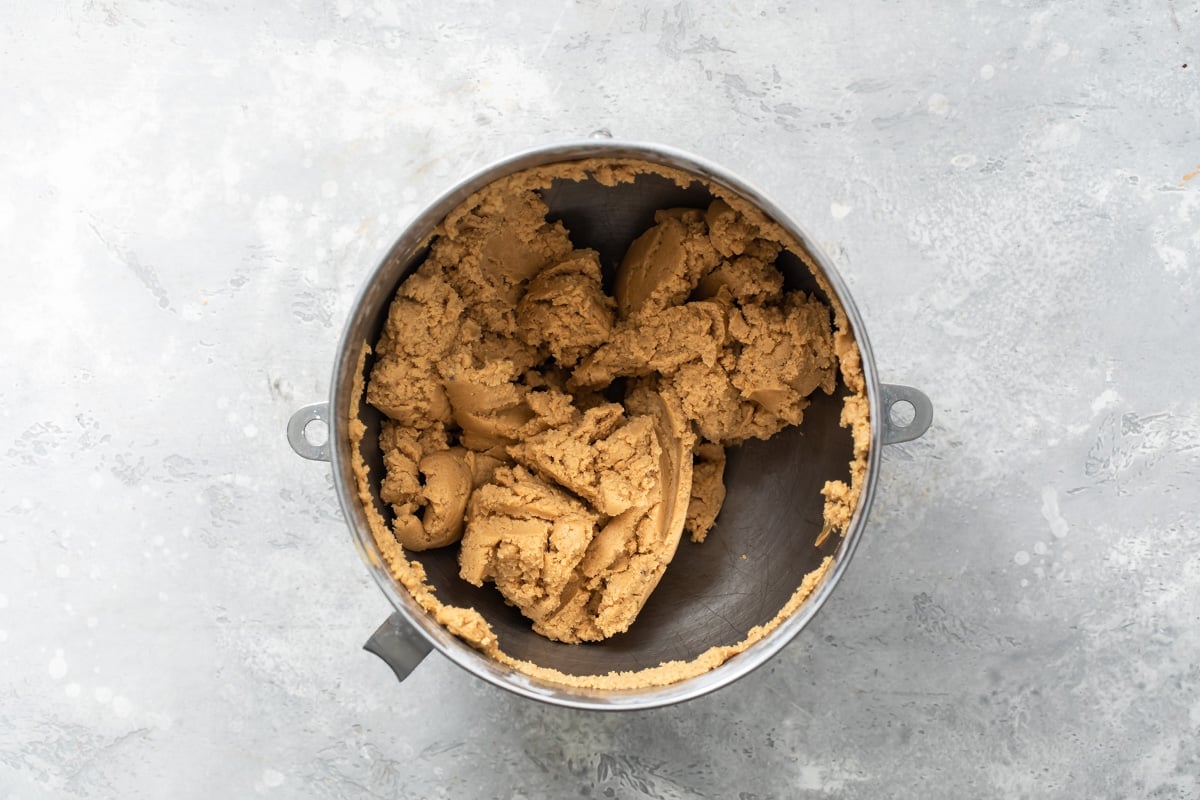
- Mix well and press into prepared pan.
- In a small, microwave-safe bowl, heat chocolate chips and remaining 5 tablespoons butter for 1 minute. Stir carefully and continue to microwave in 30-second increments until smooth, stirring after each increment. Pour over peanut butter filling and spread evenly.
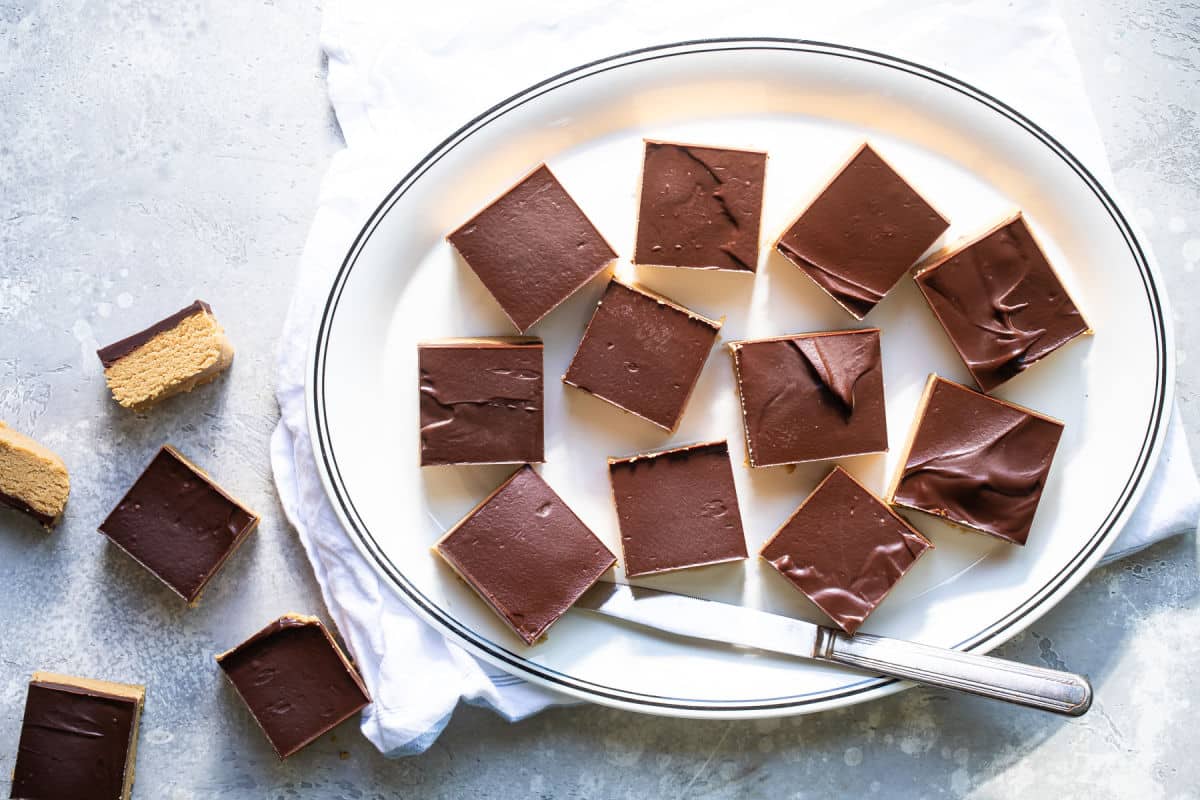
- Chill until completely firm, at least 3 hours or overnight. Let stand 10 minutes at room temperature before serving. Store leftovers in the refrigerator.
Recipe tips and variations
- Yield: I calculated the yield based on using an 8-inch by 8-inch pan and cutting the bars into 2-inch squares. This makes 16 bars. Your yield may vary depending on which size pan you use and how you cut the bars. The bars are very rich, so smaller pieces may be appreciated by some guests.
- Storage: Store covered in the refrigerator for 2 to 3 weeks. Or, if you live in a cold climate and the temperature is 40 degrees or less, feel free to store these in the pan in your garage or on your patio.
- Make ahead: These bars need some time to set up, so plan on chilling them at least a few hours, preferably overnight.
- Freezer: The Peanut Butter Bars can be frozen for up to 2 months. You can either freeze them unsliced in the pan, or slice them into pieces and store them in layers between parchment paper.
Recipe FAQs
Some cooks prefer crunchy peanut butter for the bottom layer, and even chop up peanuts for pressing over the warm chocolate before it sets up. Get creative!
If I’m using a 9″x 13″ baking pan for this recipe, I will usually make a double batch. BUT, readers have used a larger pan for a single recipe and have been happy too, claiming it makes a thinner bar that is more like the real thing.
Christmas Crack
You’ll love this salty, sweet, crunchy, chewy saltine cracker candy, sometimes known as Christmas Crack, and you can make it in 15 minutes with just 5 ingredients!
View Recipe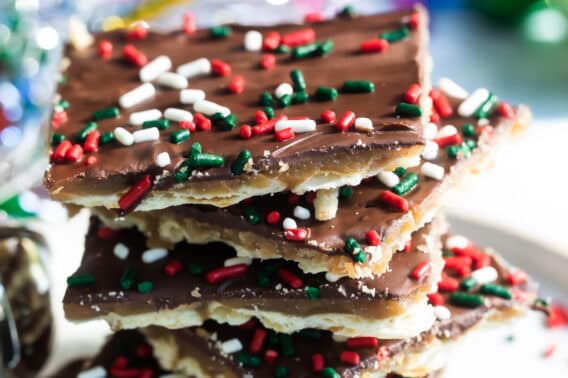
More homemade confections
Candy Recipes
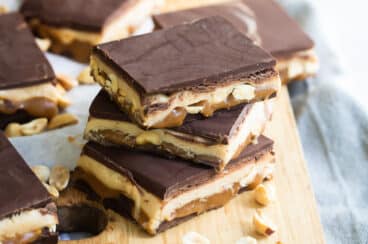
Homemade Snickers Bars

Candy Recipes
OREO Cookie Balls
Candy Recipes
Peanut Butter Balls Recipe
Candy Recipes
Easy Microwave Peanut Brittle
Join Us
No Bake Peanut Butter Bars
Ingredients
- 10 tablespoons butter room temperature, divided (see note 1)
- 1 1/2 cups graham cracker crumbs (see note 2)
- 1 3/4 cups powdered sugar
- 1 1/2 cups peanut butter (see note 3)
- 1 cup semi-sweet chocolate chips or milk chocolate chips (see note 4)
Instructions
- Line an 8-inch or 9-inch square baking pan with a foil sling for easy cleanup and coat with nonstick spray.
- In a large bowl, cream 5 tablespoons butter, graham crackers, and powdered sugar until smooth. Stir in peanut butter. Mix well and press into prepared pan.
- In a small, microwave-safe bowl, heat chocolate chips and remaining 5 tablespoons butter for 1 minute. Stir carefully and continue to microwave in 30-second increments until smooth, stirring after each increment. Pour over peanut butter filling and spread evenly.
- Chill until completely firm, at least 3 hours or overnight. Let stand 10 minutes at room temperature before serving. Store leftovers in the refrigerator.
Recipe Video
Notes
- Butter: Cold butter usually softens up in about 30 minutes when left out at room temperature (much longer if frozen). To soften butter in the microwave, cut each stick of butter in half, unwrap, and place on a microwave-safe plate. Then cook the butter at 10% power (that’s ten percent!) for 1 minute. Afterward, gently press on the butter with your finger. If still too firm, cook for another 40 seconds at 10% power.
- Graham cracker crumbs: The original version of this recipe was prone to grittiness (the brown sugar would not always dissolve completely in the melted butter). To fix this issue, we updated the recipe to use graham cracker crumbs instead of brown sugar, and it’s fabulous. But if you miss the old way, just substitute an equal amount of brown sugar for the graham cracker crumbs.
- Peanut butter: I use store-bought peanut butter for this recipe, and Skippy is my favorite brand.
- Chocolate: I like regular semi-sweet chocolate chips, but you can use milk chocolate if you prefer that.
- Yield: I calculated the yield based on using an 8-inch by 8-inch pan and cutting the bars into 2-inch squares. This makes 16 bars. Your yield may vary depending on which size pan you use and how you cut the bars. The bars are very rich, so smaller pieces may be appreciated by some guests.
- Storage: Store covered in the refrigerator for 2 to 3 weeks. Or, if you live in a cold climate and the temperature is 40 degrees or less, feel free to store these in the pan in your garage or on your patio.
- Make ahead: These bars need some time to set up, so plan on chilling them at least a few hours, preferably overnight.
- Freezer: The Peanut Butter Bars can be frozen for up to 2 months. You can either freeze them unsliced in the pan, or slice them into pieces and store them in layers between parchment paper.
Have you made this for large crowd using a Costco size jelly roll pan, wondering how they turn out? And would I need to double or 1.5x, what is best?
Hi Renee! I haven’t made this in a Costco jelly roll pan. I am not sure the best way to proceed, but you could try doubling it and if you have too much peanut butter mixture, you could set some aside and press it into another smaller pan just to use it up. Good luck!
Just an update, I doubled the ingredients and it was perfect for the Costco size jelly roll pan! Great, easy recipe and they’re delicious, very rich!! So it’s more like the candy bar, but bite size pieces were great!! Served them at Teachers Appreciation and they were a hit!
Perfect, Renee! Yes, they are quite rich. When my grandma saw the size of the pieces I cut for the photos in my post, she was quite surprised and said they were WAY too big. 🙂 Well, I guess that’s just how I roll…. but I’m glad doubling worked out and I will add that info to the post and credit your insight. 🙂 Thank you so much and I’m glad it all worked out!
Delicious looking recipe! Back in our day (your Grandma’s and mine) natural or homemade peanut butter always had a layer of oil on it which probably would have made the bar runny. My chocolate preference? I’m a Milk Chocolate lover!
Hi, Deborah! You know, I’ve recently discovered that if it’s imported milk chocolate (from Europe or Australia), it’s really really REALLY good! So I guess I’m becoming a milk chocolate lover also! I do think the natural peanut butter might make the bars strange, too. Plus, if you are worried about the sugar in peanut butter, then the sugar in these bars probably isn’t right for you, either. 🙂 Thank you so much for stopping by my blog!
I want to try this with sunbutter or almond butter so my daughter can have it. Yum!
And then blog it! I’d love to hear how it goes, and then I can list your recipe for people who have allergies. 🙂
This looks like fun to make and I’ll certainly try it out. I prefer either or, but more over I like milk chocolate.
Another vote for the milk chocolate! 🙂 Thanks for your comment and I hope you get a chance to try the bars at some point.
I like the sound of these will make them after shop day. But to answer your question I am more a normal chocolate rather then dark,I find the dark to strong. Oh just for the record I am Female.
Thank you for weighing in, Julie! 😀 I do really like semi-sweet too, that’s a great balance. Have a lovely day!
I’m a dark chocolate fan (mainly because I’m lactose intolerant and I have less of a reaction to dark chocolate). My husband prefers milk chocolate.
And also because dark chocolate is better. 😀 But I really do think there are some excellent dark chocolates out there, even if they are vegan. They are so flavorful! Thanks for stopping by Jenn!
How much butter doi i add to melt the chocolate
Hi Linda, 5 tablespoons or half the total amount of butter in the recipe. Sorry that wasn’t clear for you! I hope this makes sense and let me know if not. Thanks. -Meggan
You can’t put foil in micro.
Hi Pat, I will have to fix my wording of this recipe so it’s not as confusing. There isn’t a point where you actually put foil in the microwave. Basically, you line a pan with foil and then, in a separate bowl, microwave different ingredients. And ultimately those melted ingredients end up on the foil, but the foil never goes in the microwave. Sorry for confusion. I’ll reword this!!! Thanks.
Why can’t all-natural peanut butter be used?
Hi Liann, this is a note from my grandma’s original recipe. I guess I can’t think of a good reason WHY natural peanut butter wouldn’t work here. Might taste different but I would think it would still hold the shape… ? I guess I would have to test it myself to know if it actually makes a difference which I haven’t done.
These are drool worthy, Meggan! I can’t believe how simple they are to make, dangerously simple!! Hope you have a wonderful Thanksgiving!!
p.s. Keith and I are both in the dark chocolate camp – Theo 85% is our favorite!! 🙂
Wow these look awesome! Certainly on my to-do list. I make my own brown sugar too at home, the best part is I can adjust the molasses to my own liking. Love picture by the way. Cheers