This post contains affiliate links, which means I may earn a commission if you purchase through those links (at no extra cost to you).
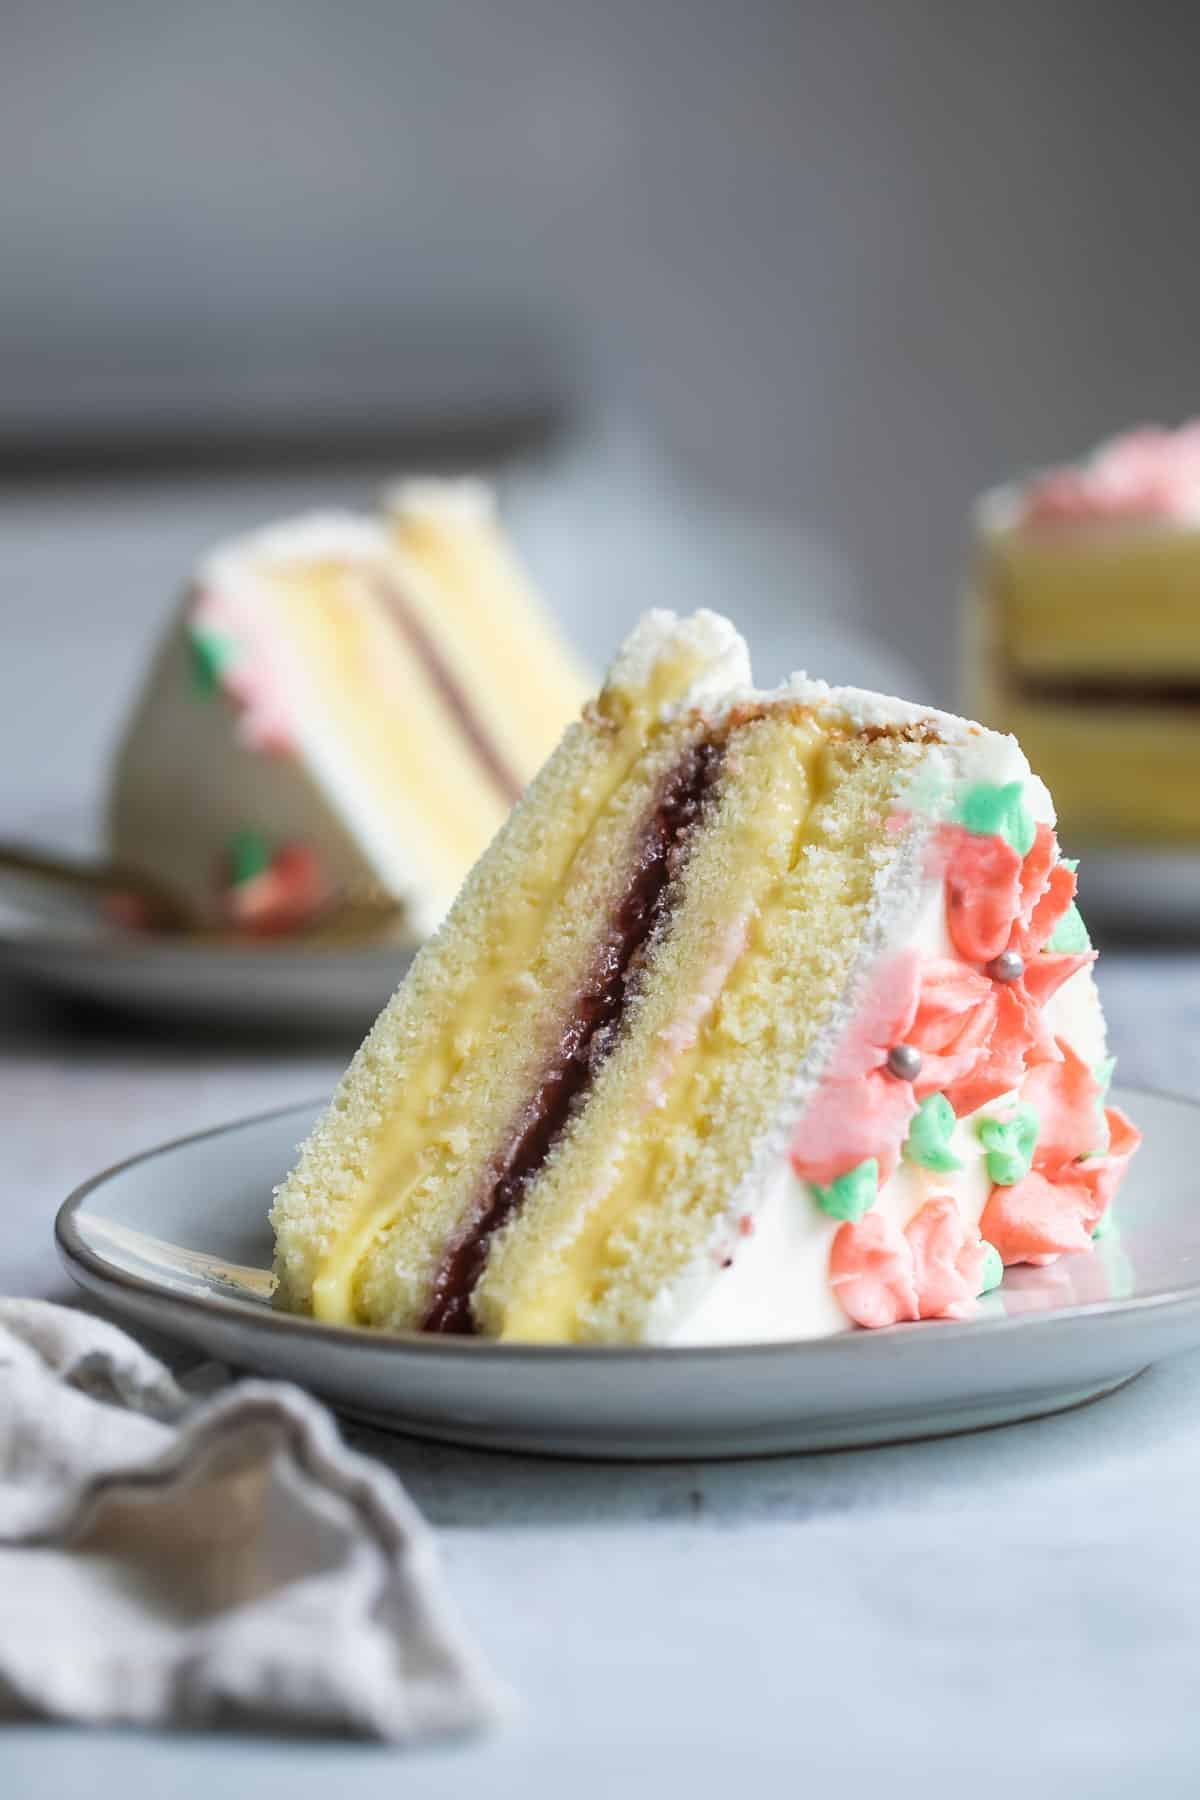
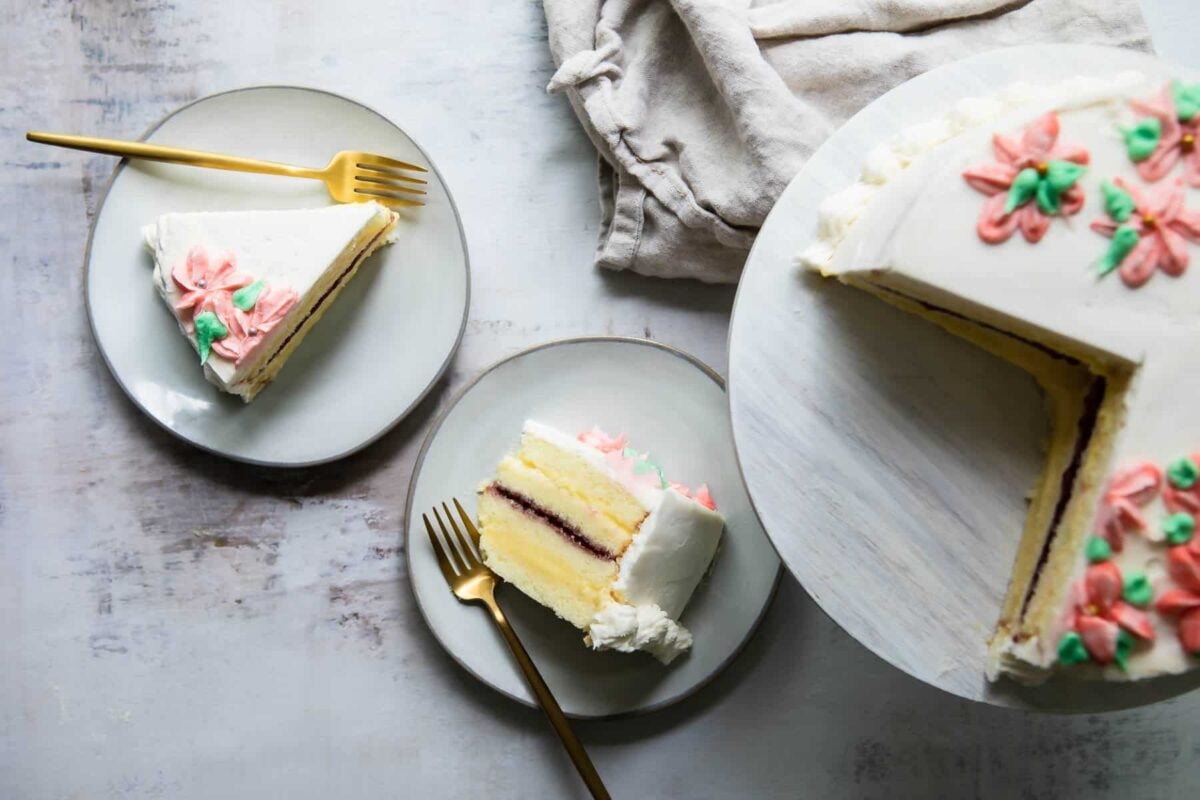
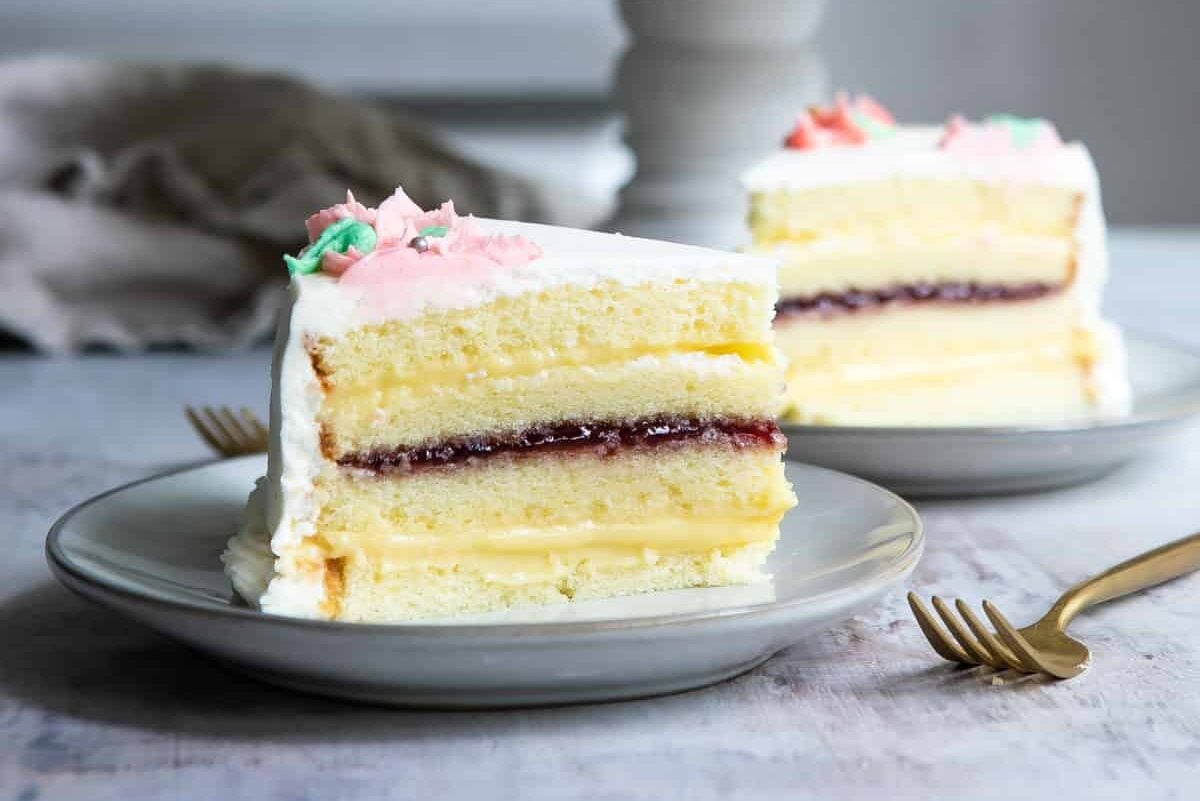
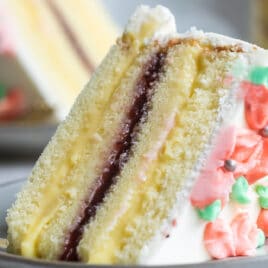
Danish Layer Cake is a specialty dessert popular in Racine, Wisconsin. It has 7 layers of total of soft vanilla cake, homemade pastry cream, and raspberry jam, all covered in a luscious vanilla buttercream frosting.
When I was growing up, I loved it when my mom made me Danish Layer Cake for my birthday.
Her side of the family is from a town called Racine, Wisconsin (home to Danish Bakery legend O&H), so Danish Layer Cakes were part of the fabric of her childhood.
She made things easy by starting with a boxed mix, but I’m returning this cake to it’s full glory with full-on from-scratch status.
Table of Contents
Recipe ingredients
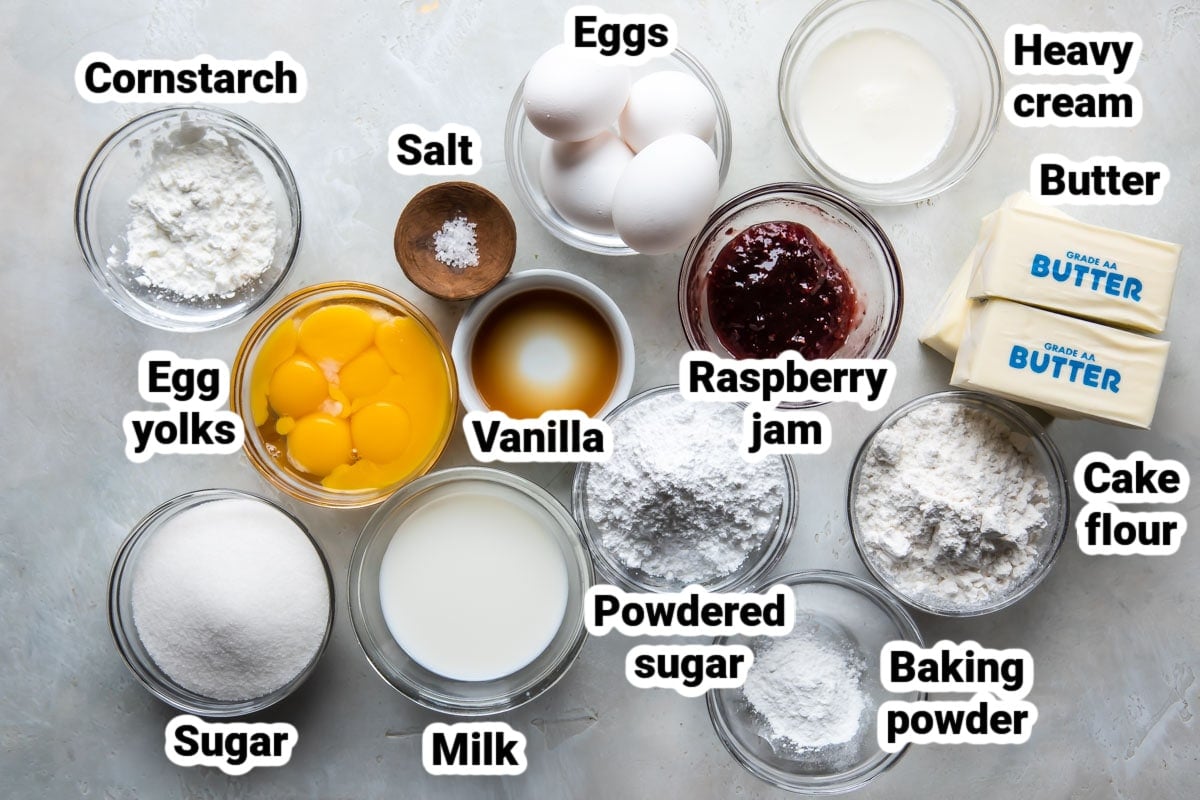
At a Glance: Here is a quick snapshot of what ingredients are in this recipe.
Please see the recipe card below for specific quantities.
Equipment and ingredient notes
- 8-inch cake pans: Do not substitute 9-inch cake pans.
- Whole milk: Do not substitute low-fat milk for the whole milk in the vanilla cake.
- Seedless raspberry jam: If you cannot track this down, raspberry jam with seeds, or another seedless jam, may be substituted. Strawberry seedless jam tastes great in this cake.
Step-by-step instructions
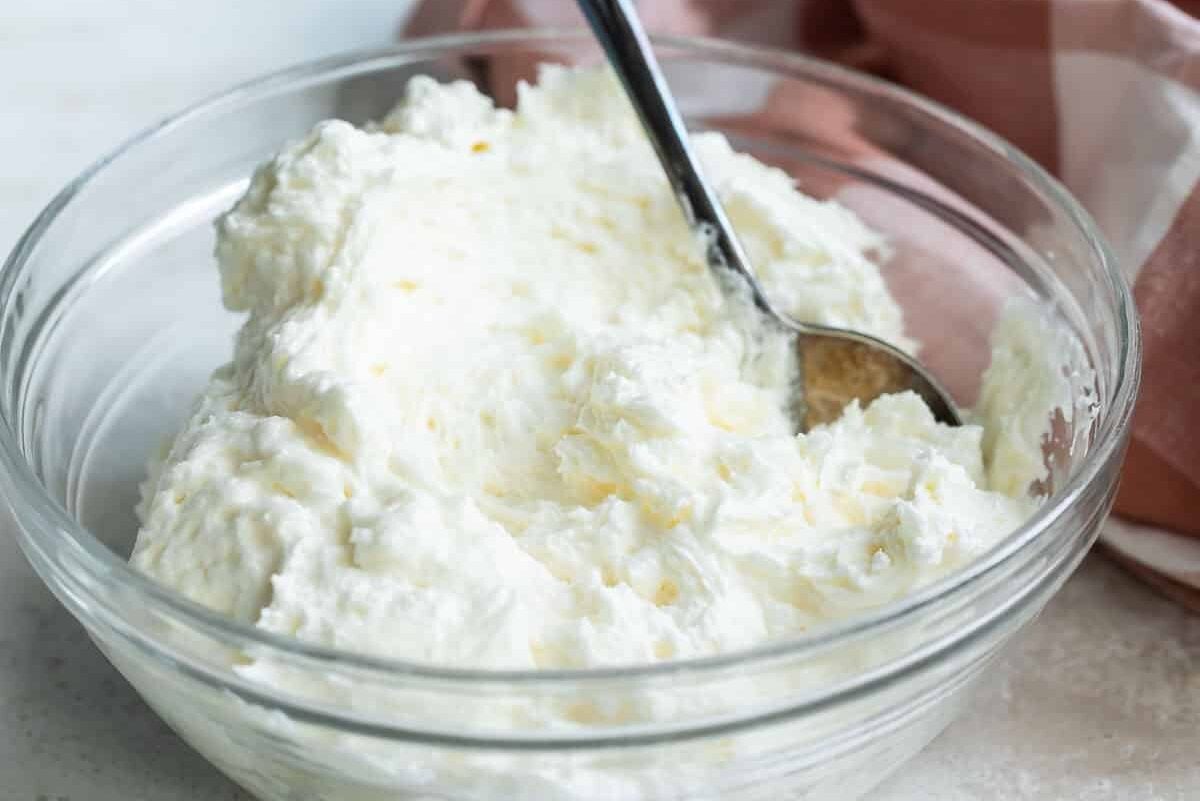
To make the pastry cream:
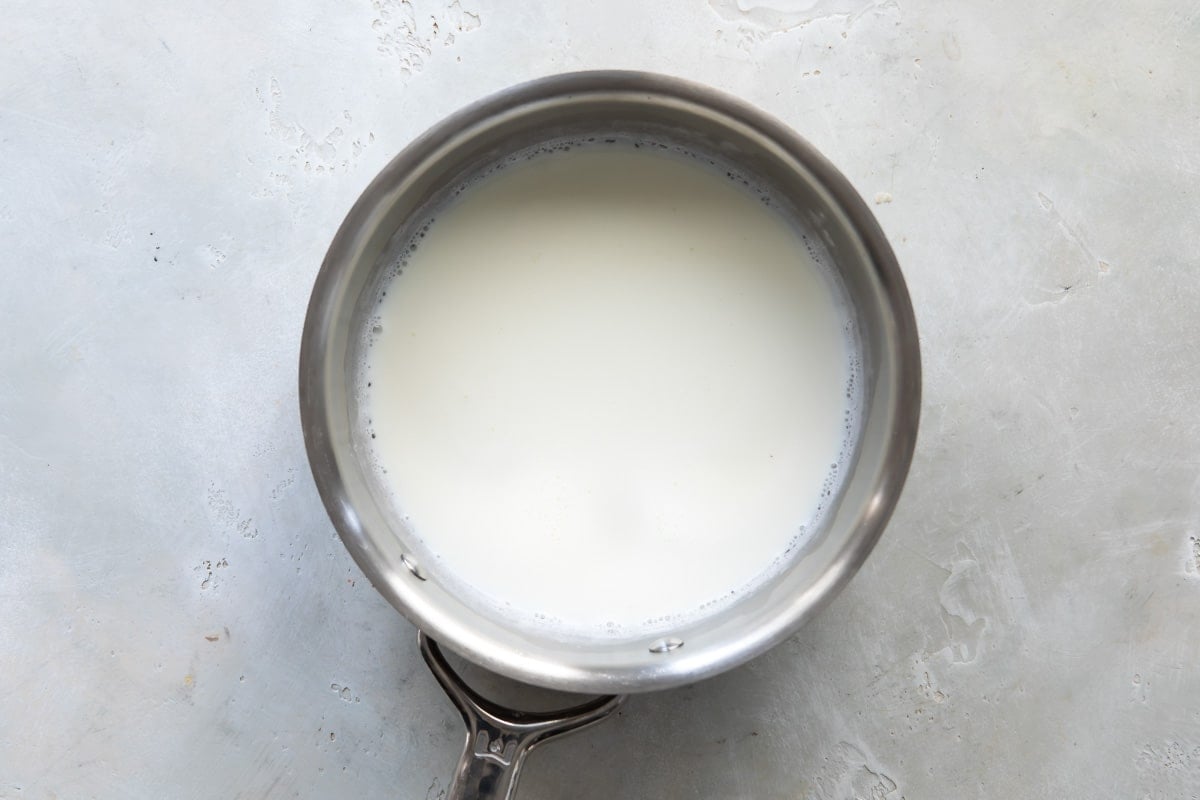
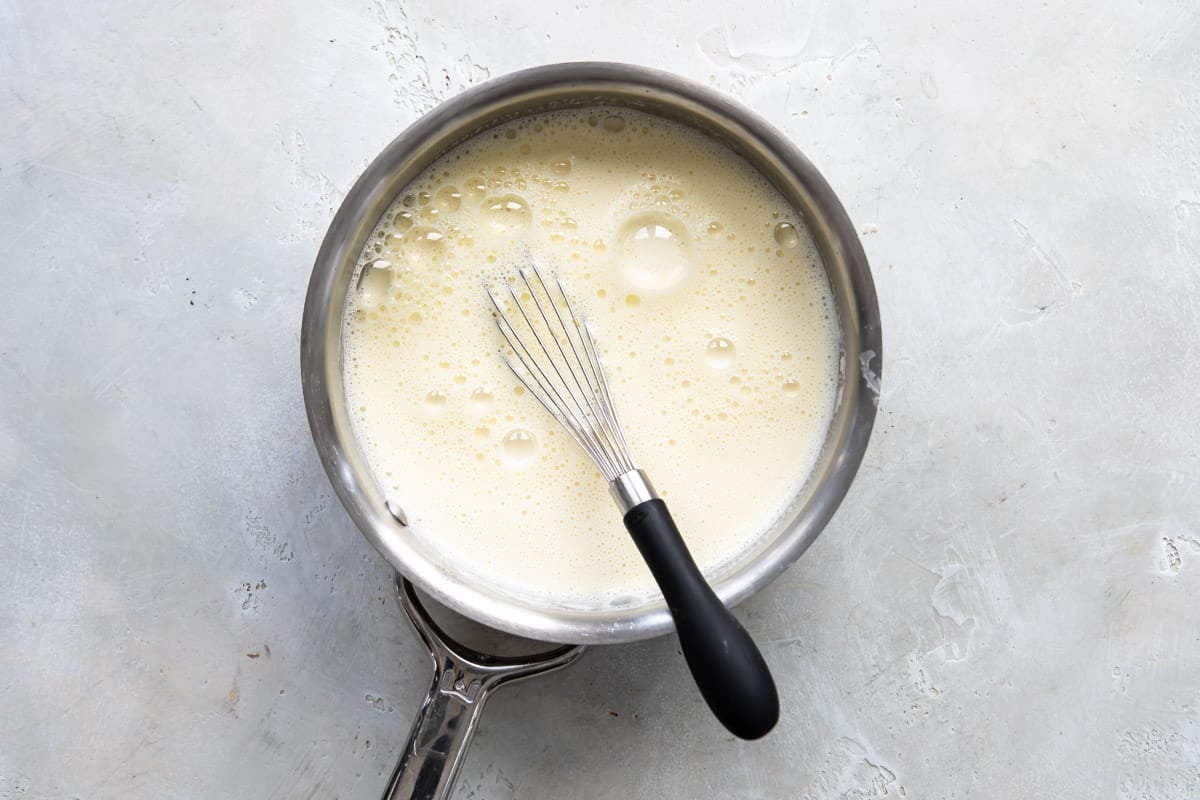
- In a medium non-aluminum saucepan over medium heat, warm milk until tiny bubbles appear on the surface, about 6 to 8 minutes (about 180 degrees Fahrenheit/82 degrees Celsius).
- Meanwhile, In a large bowl, whisk together egg yolks and sugar. Whisk in cornstarch and salt.
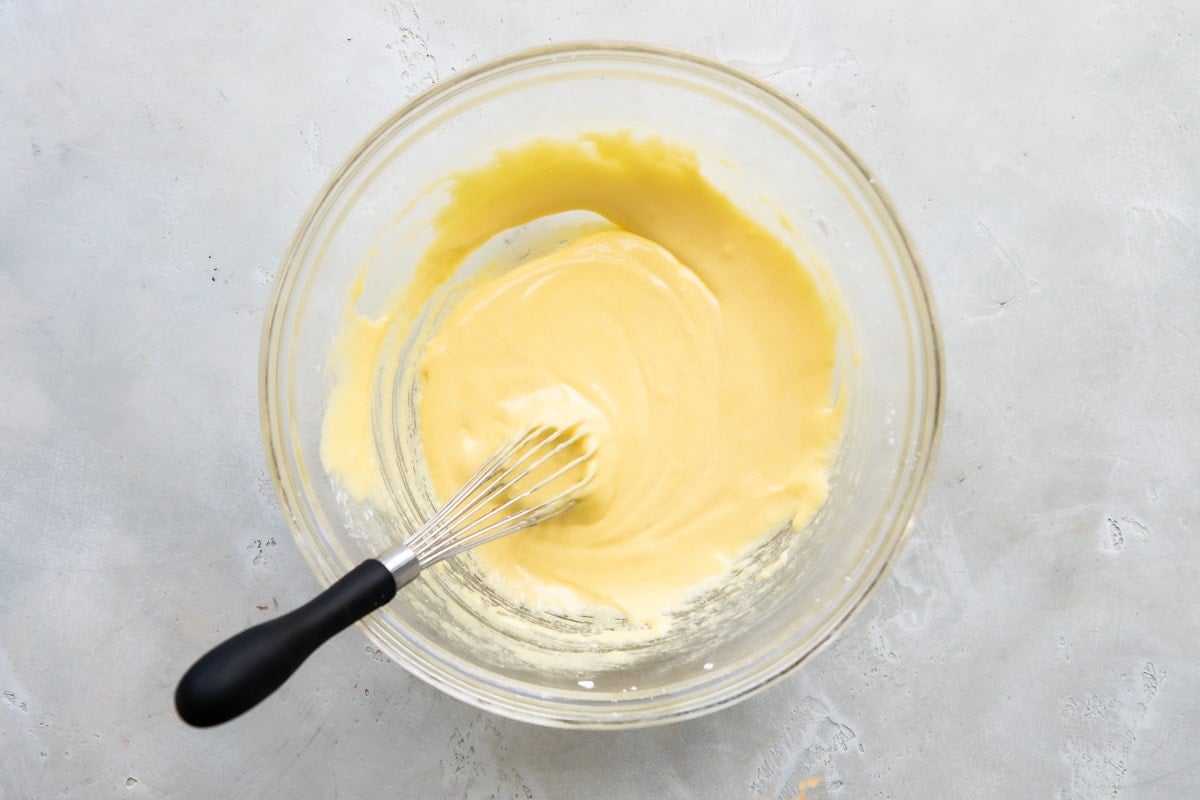
- While whisking constantly, pour in half of the hot milk.
- Whisk in remaining hot milk and return to saucepan.
- Cook over medium heat, whisking constantly, until the mixture thickens to a firm consistency, about 5 to 8 minutes.
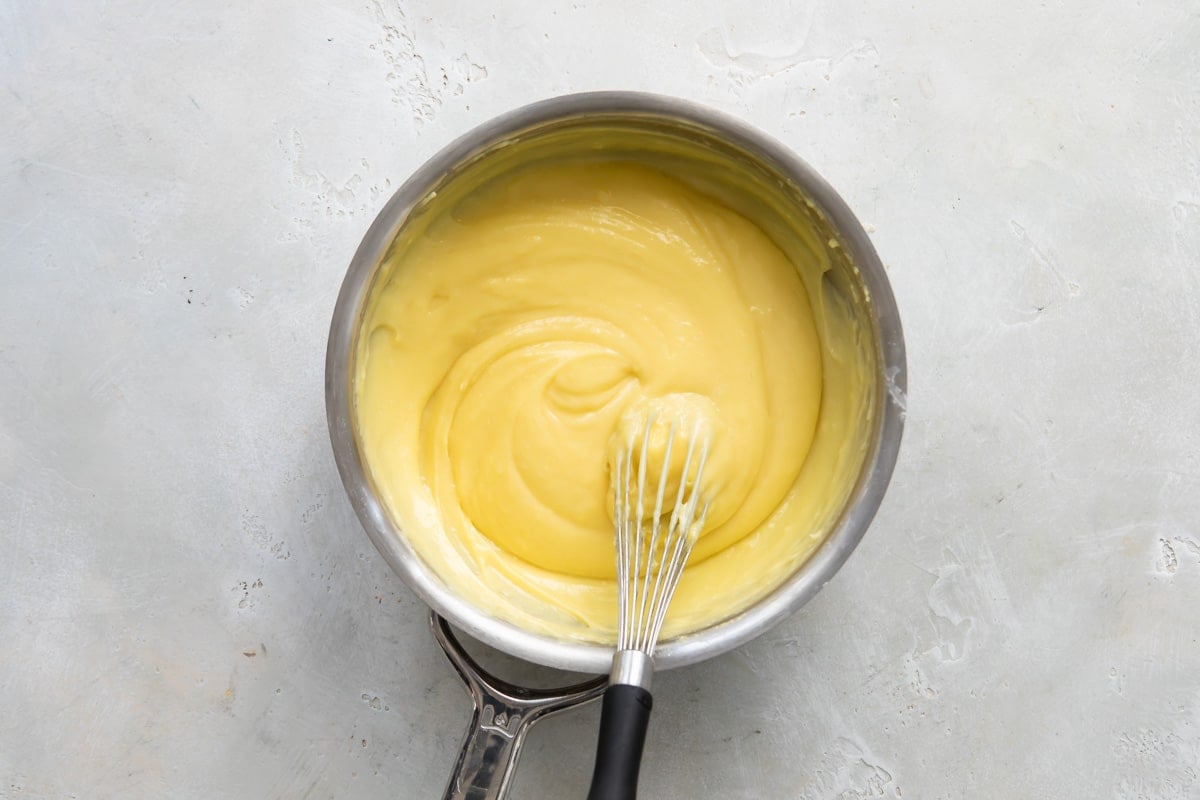
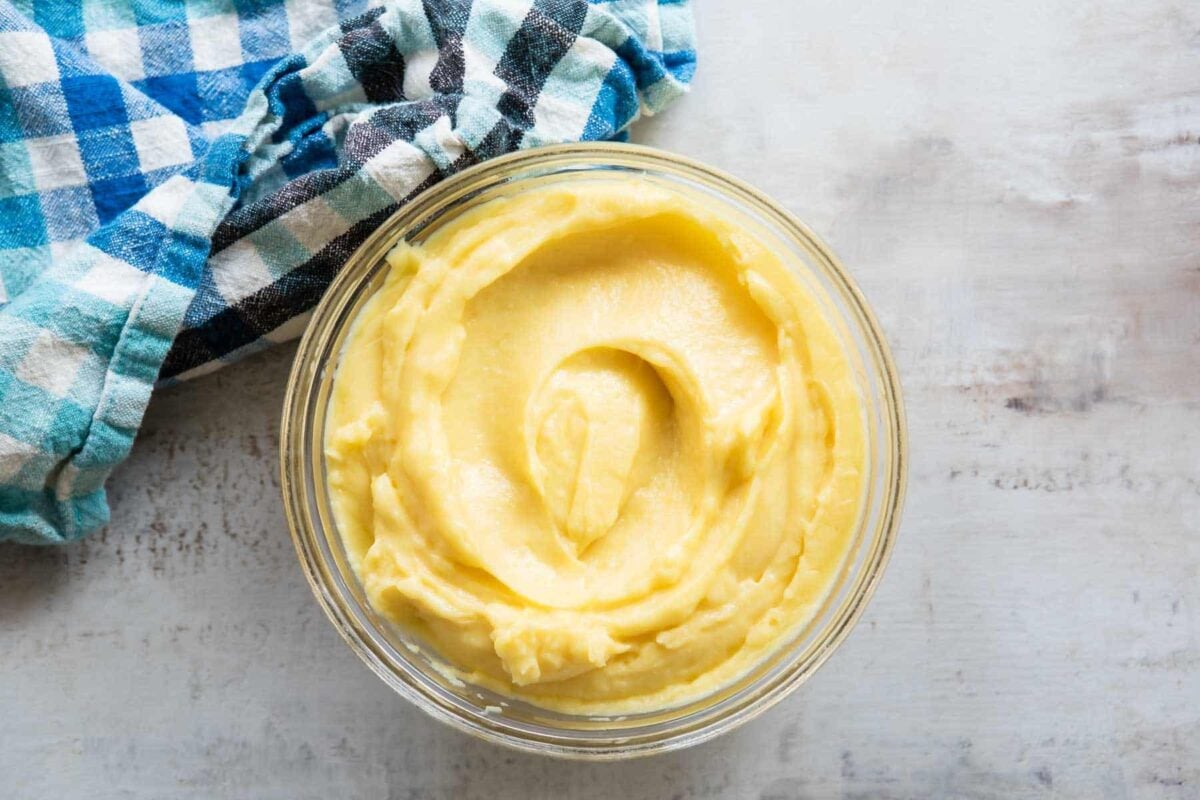
- Whisk in vanilla. Scrape in to a bowl. Cover with plastic wrap, pressing it directly on to the surface of the pastry cream.
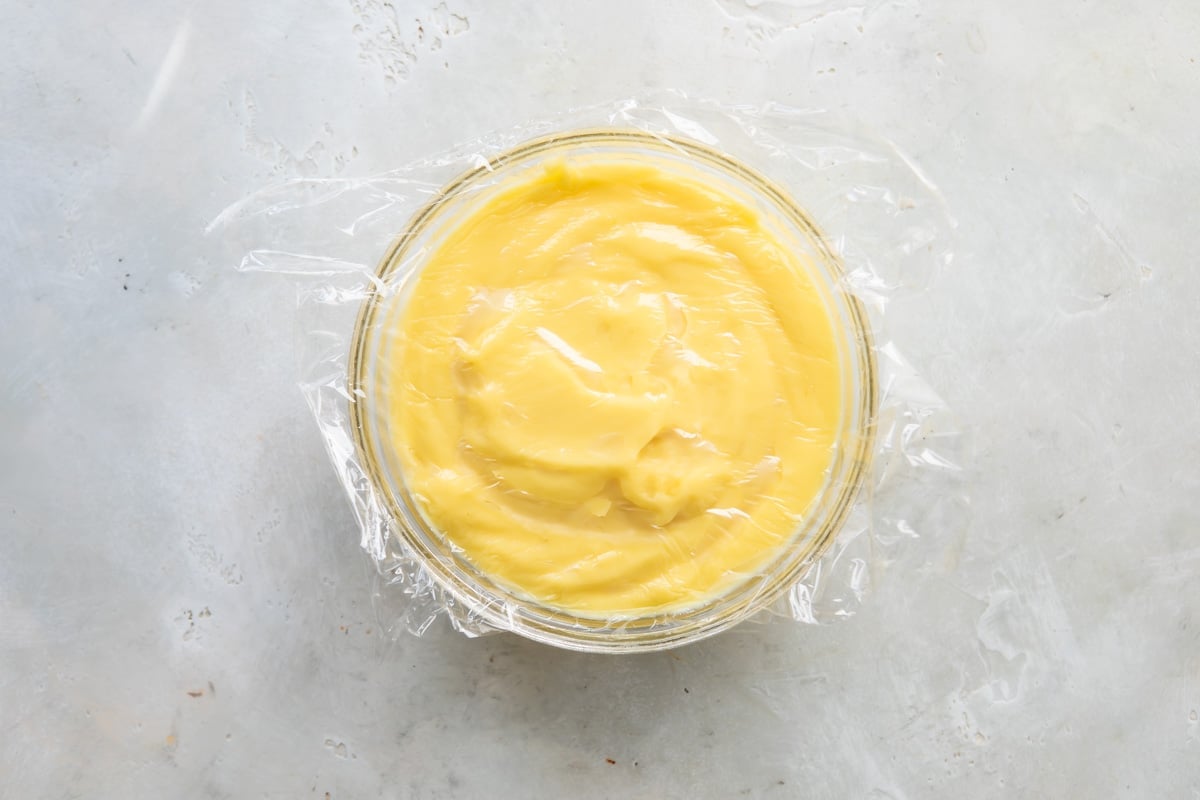
- Refrigerate until chilled, about 2 to 3 hours. (Note: You will have just over 2 cups of pastry cream and you only need about 1 ½ cups for this recipe.)
To make the cake:
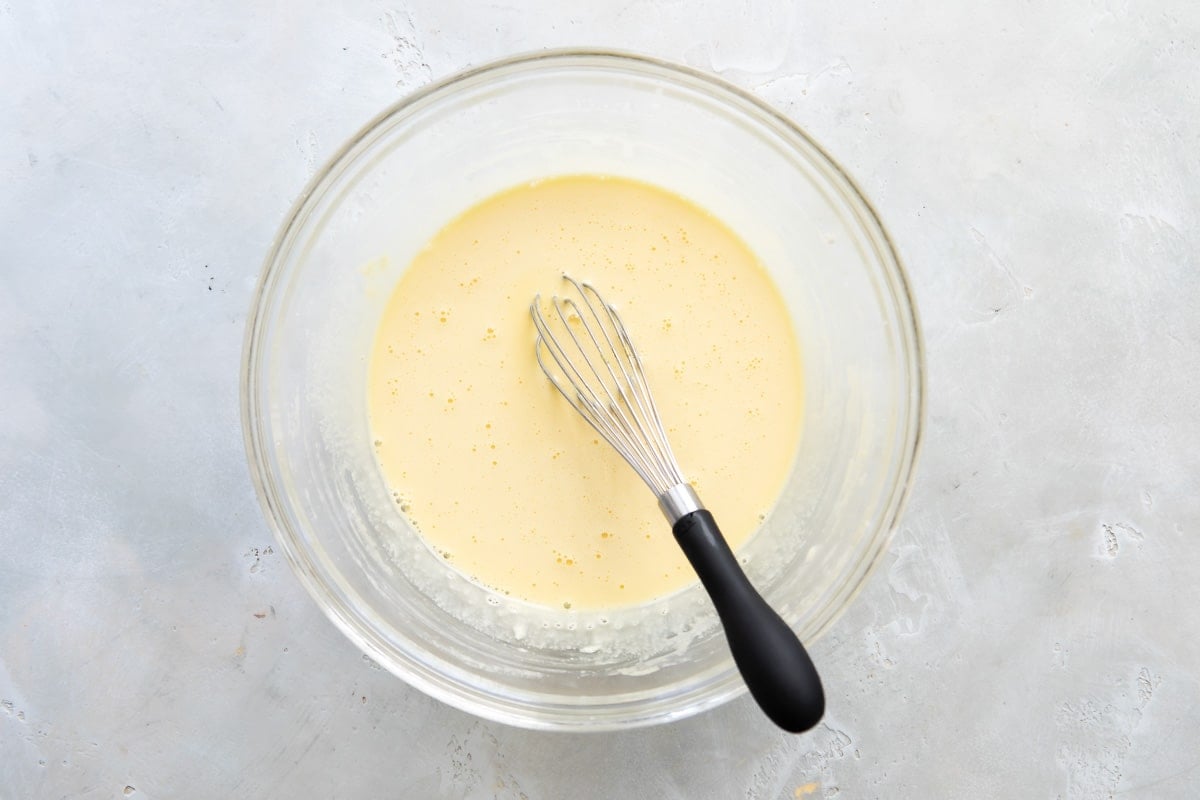
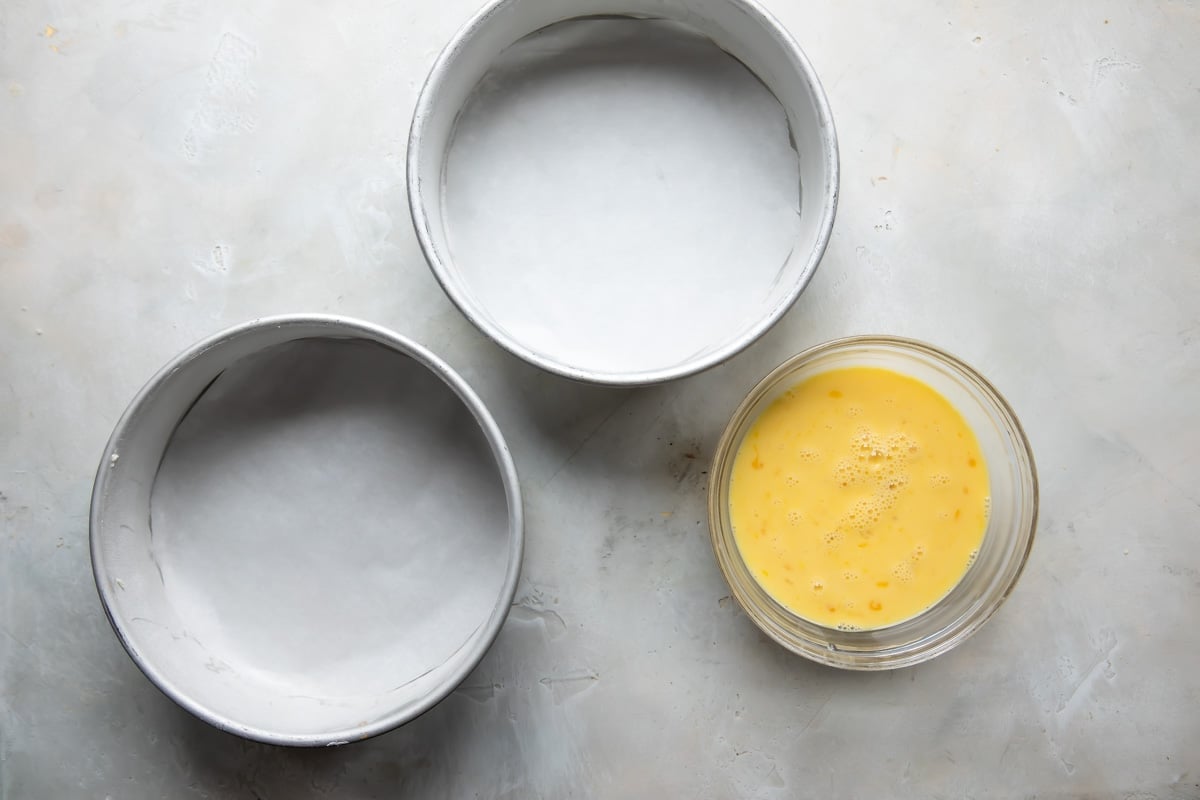
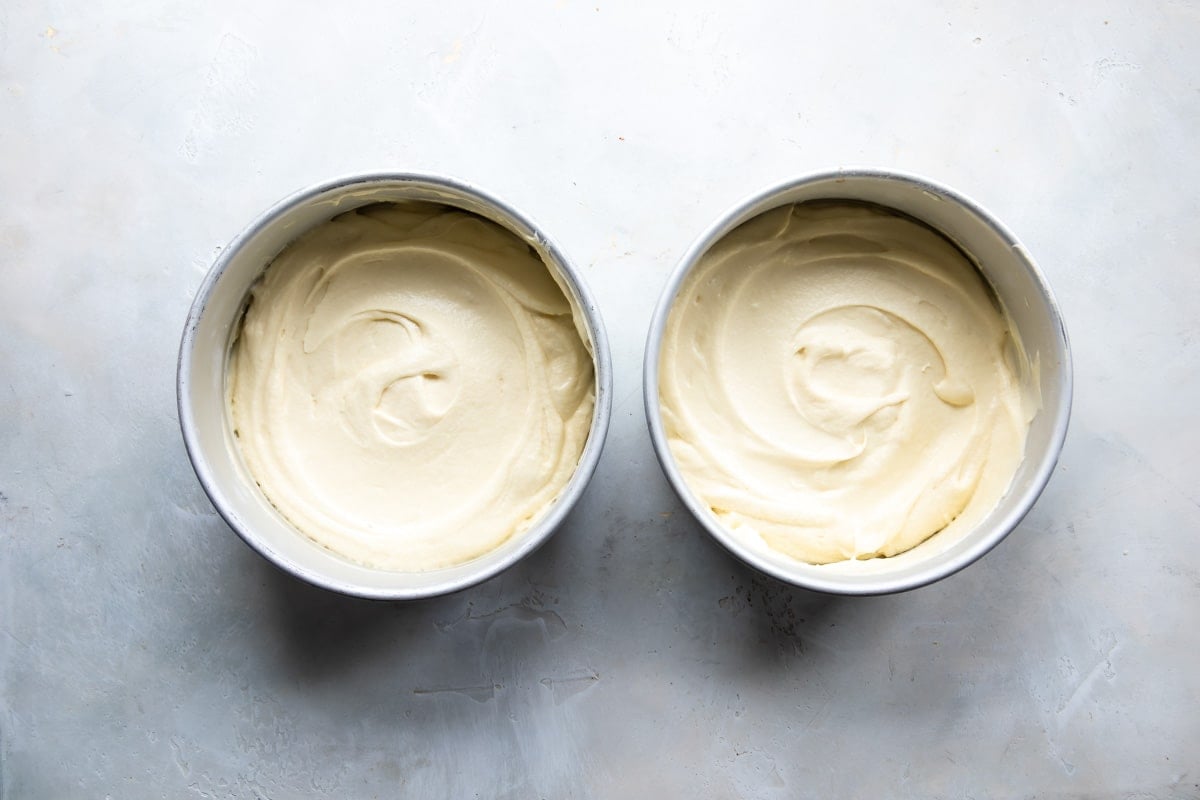
- Preheat oven to 350 degrees. Grease and flour 2 (8-inch) round cake pans, then line parchment paper. In a small bowl, whisk together milk, eggs, and vanilla. Set aside.
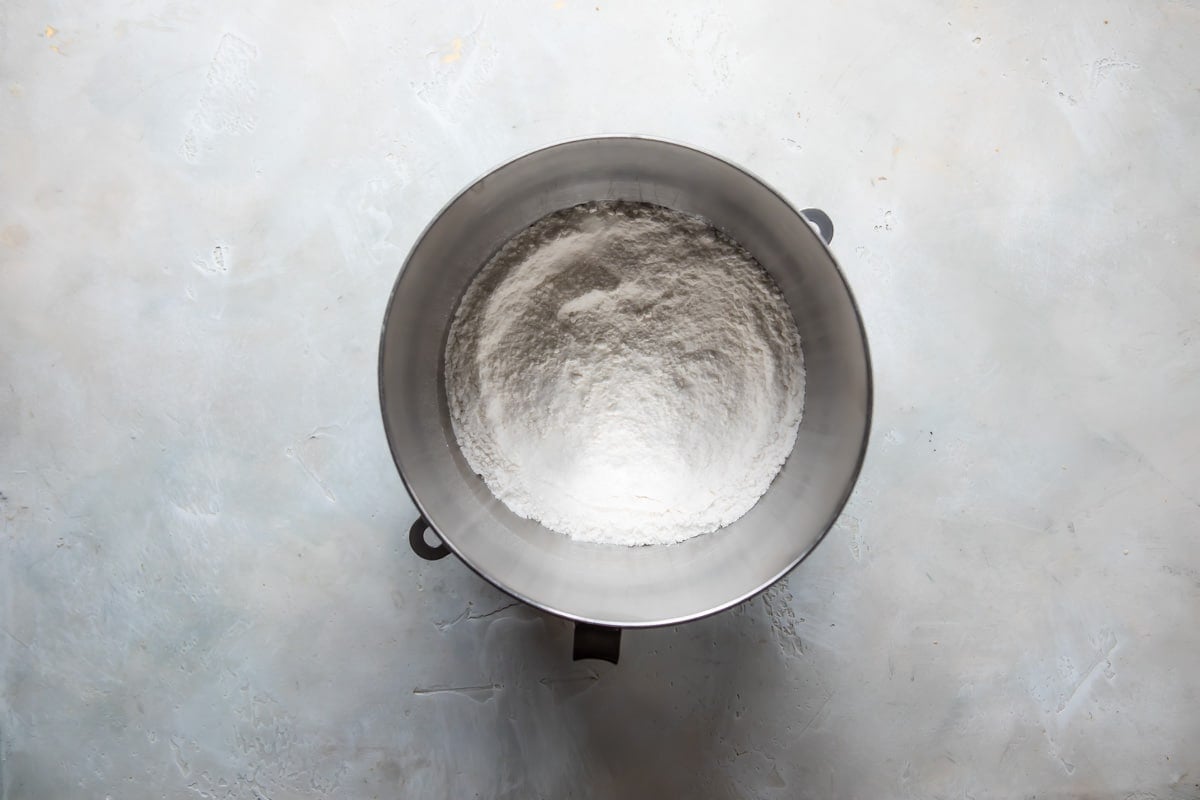
- In the bowl of a stand mixer fit with the whisk attachment, beat together flour, sugar, baking powder, and salt.
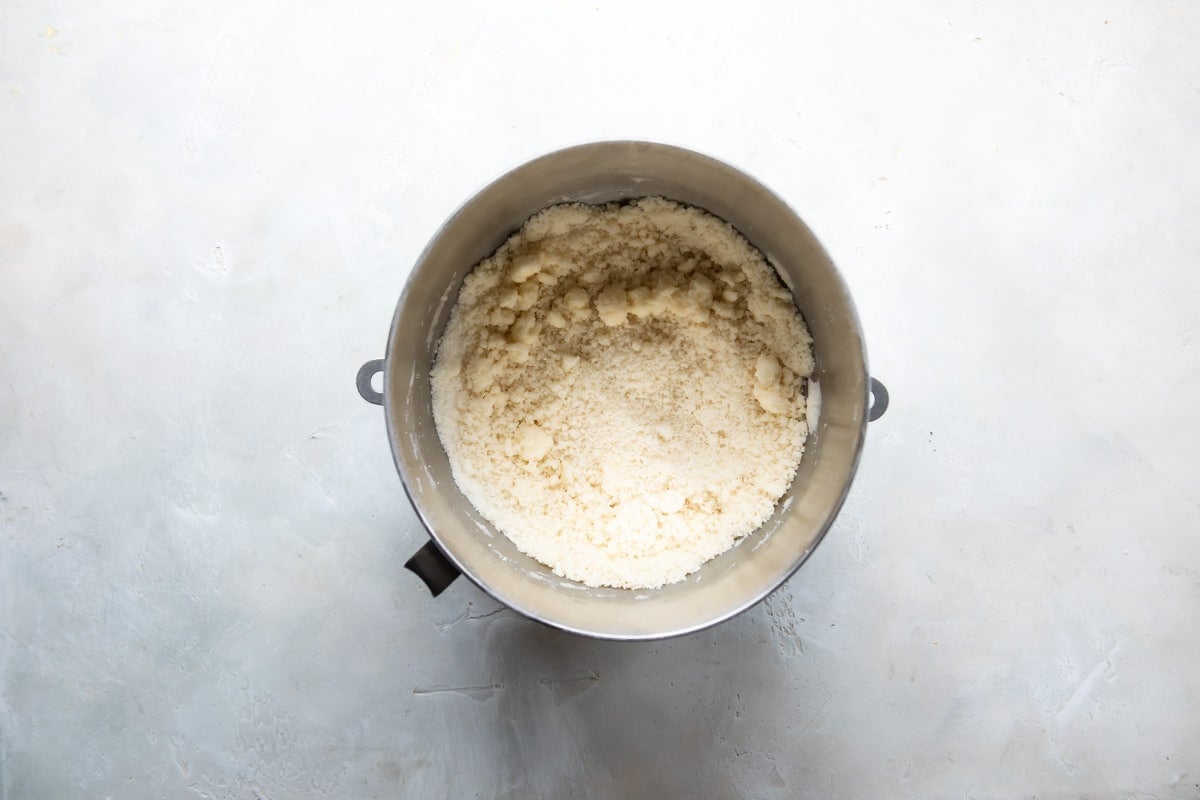
- With the mixer on medium-low speed, beat the butter in to the flour mixture one piece at a time. Continue beating until the mixture resembles moist crumbs, 1 to 3 minutes total.
- Add the milk mixture to the mixer and beat until light and fluffy, 1 to 3 minutes longer. Stir by hand with a rubber spatula to make sure the batter is fully combined.
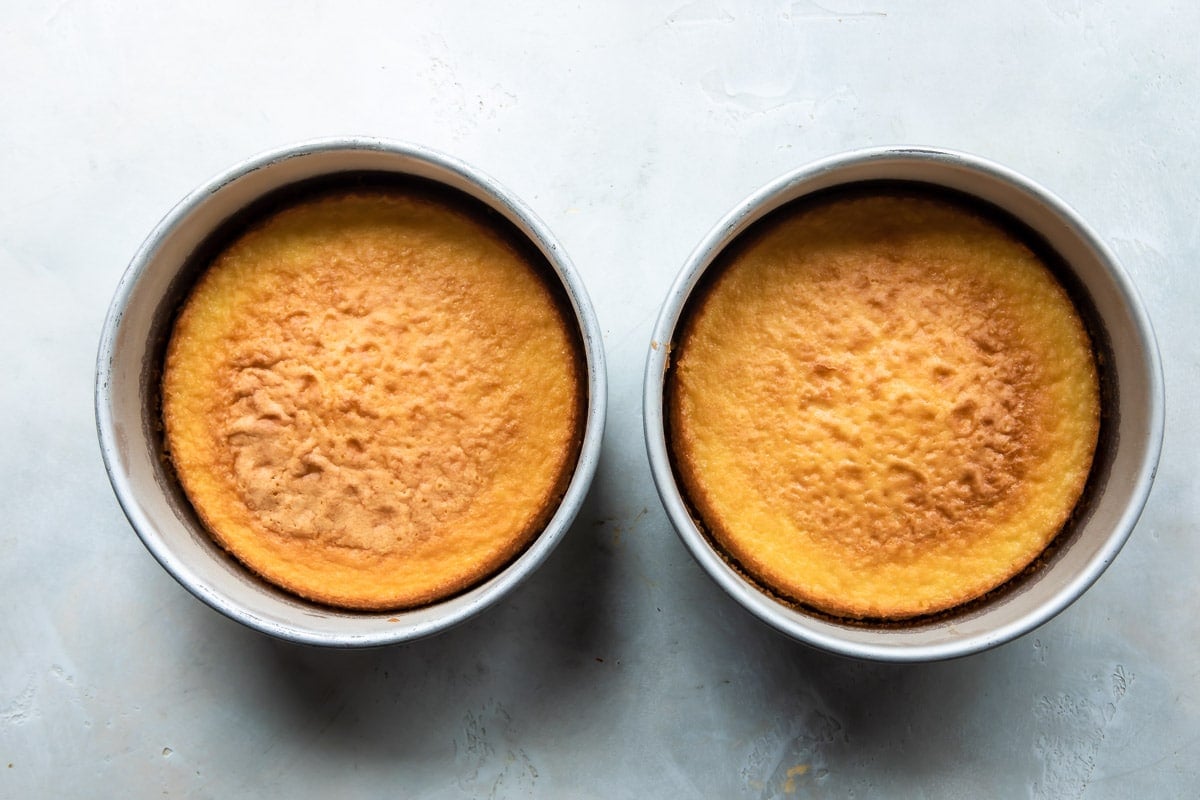
- Divide the batter evenly between both pans, gently tapping the pans on the counter to settle the batter. Bake until a toothpick inserted in the center of the cake comes out dry with a few crumbs attached, 20 to 25 minutes. Rotate the pans halfway through baking time.
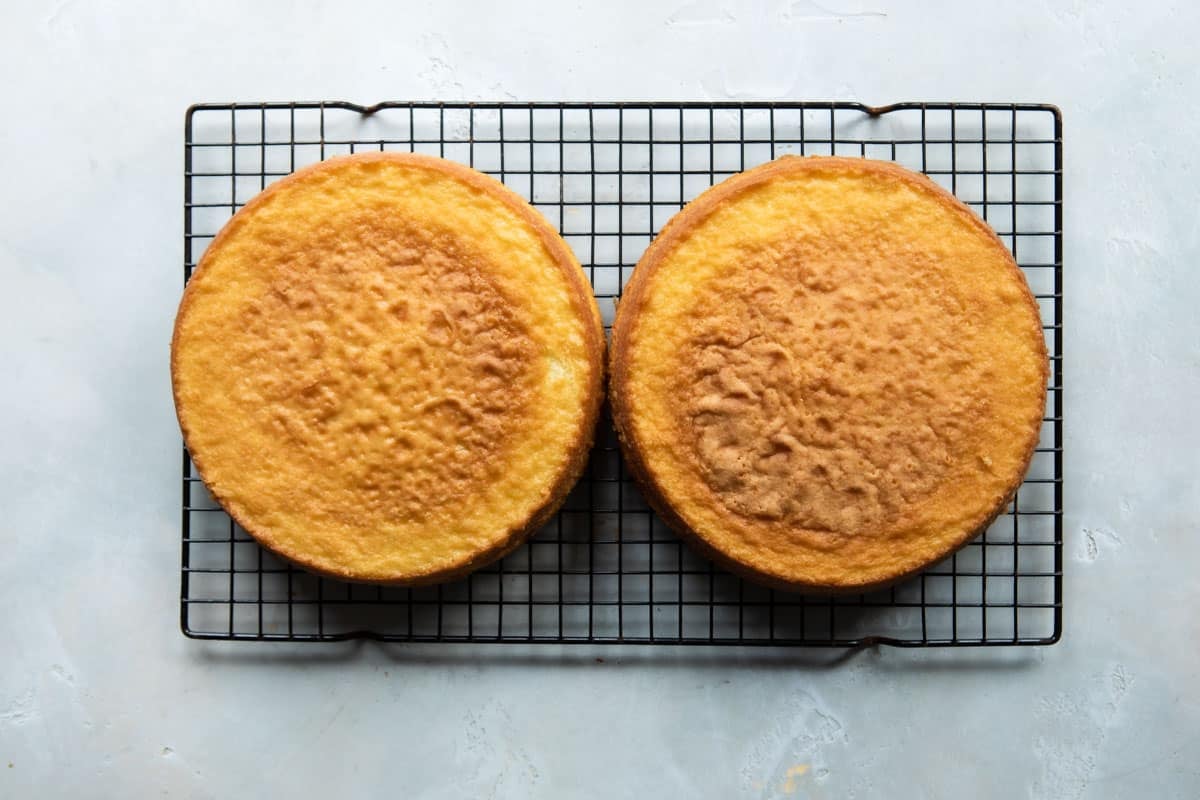
- Cool the cakes in the pans for 10 minutes.
- Run a small sharp knife around the inside of each pan to loosen, then flip the cakes on to a wire rack. Peel off the parchment paper, then flip the cakes right side up to cool completely, about 2 hours.
To make the frosting:
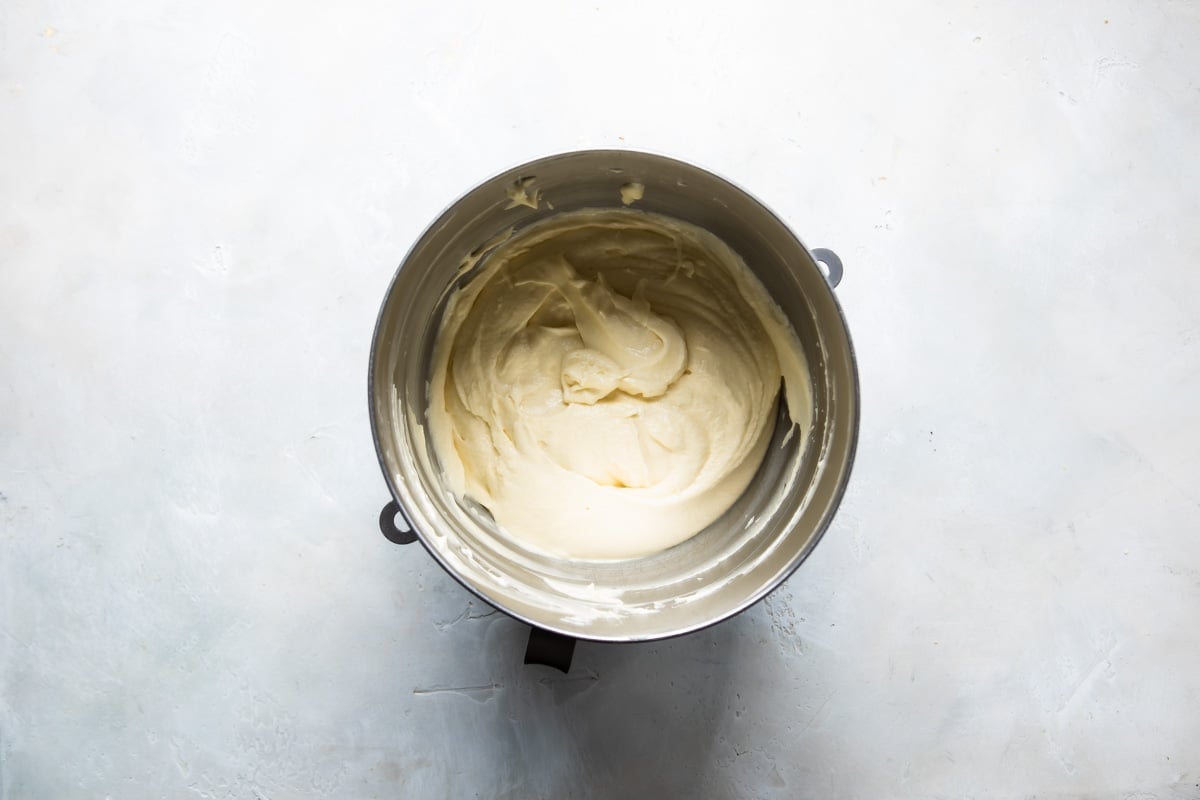
- In a stand mixer fit with the paddle attachment, cream butter until pale and fluffy, about 3 minutes. Reduce mixer speed to low. Add 4 cups powdered sugar, cream, vanilla, and salt (if using).
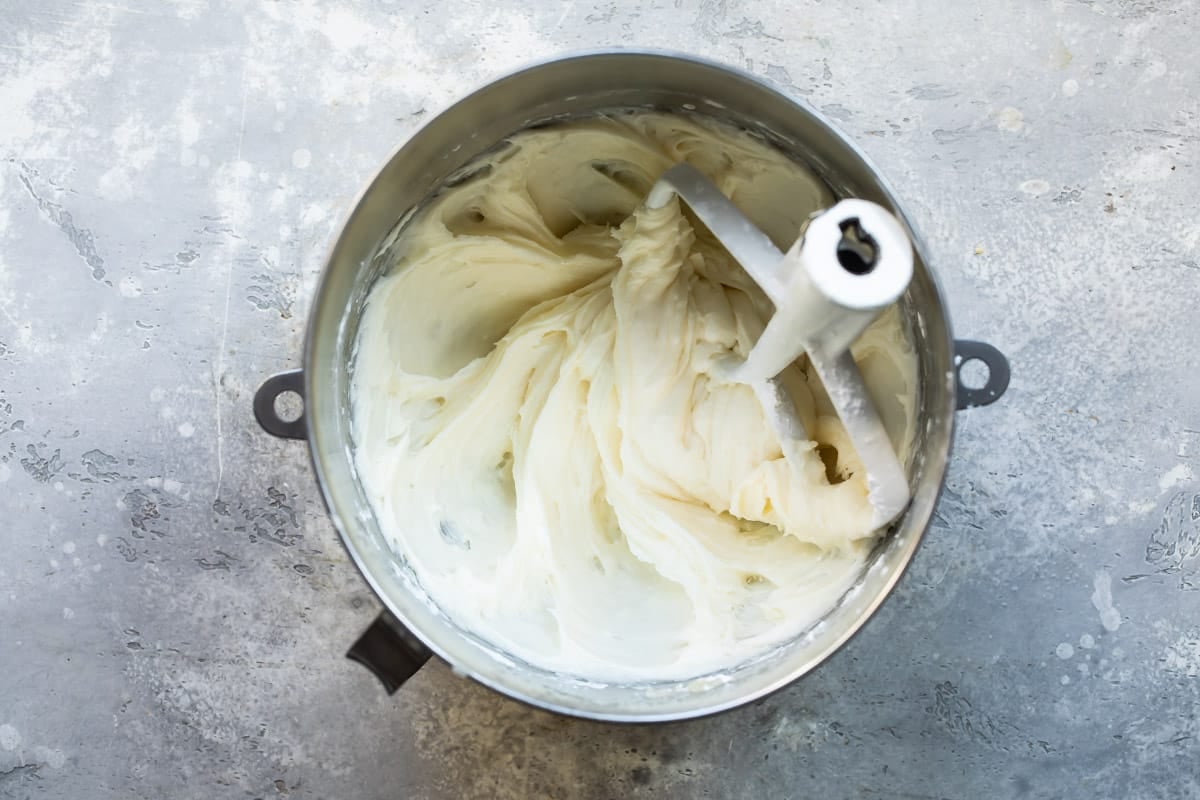
- Continue mixing 2 to 3 minutes longer. If the frosting seems too soft, add the remaining powdered sugar 2 tablespoons at a time.
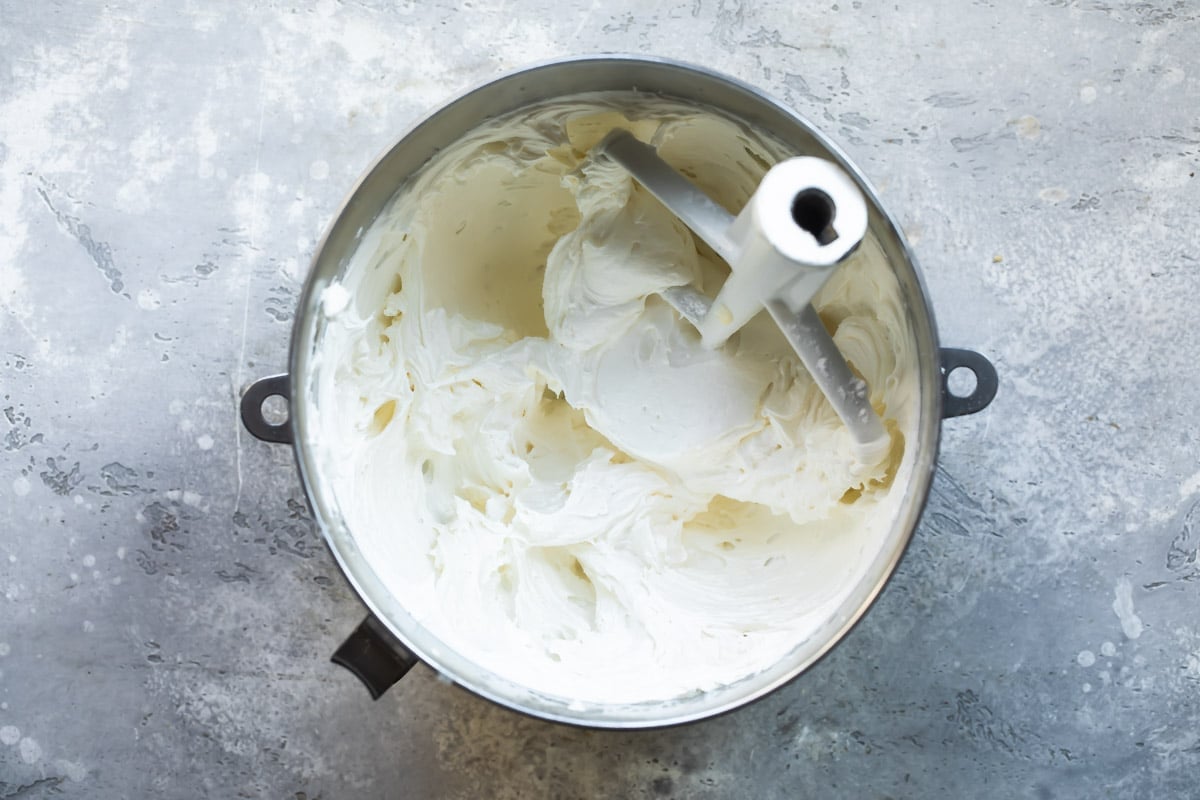
- Cover and refrigerate the frosting until assembling the cake, up to 1 week in advance.
To assemble the cake:
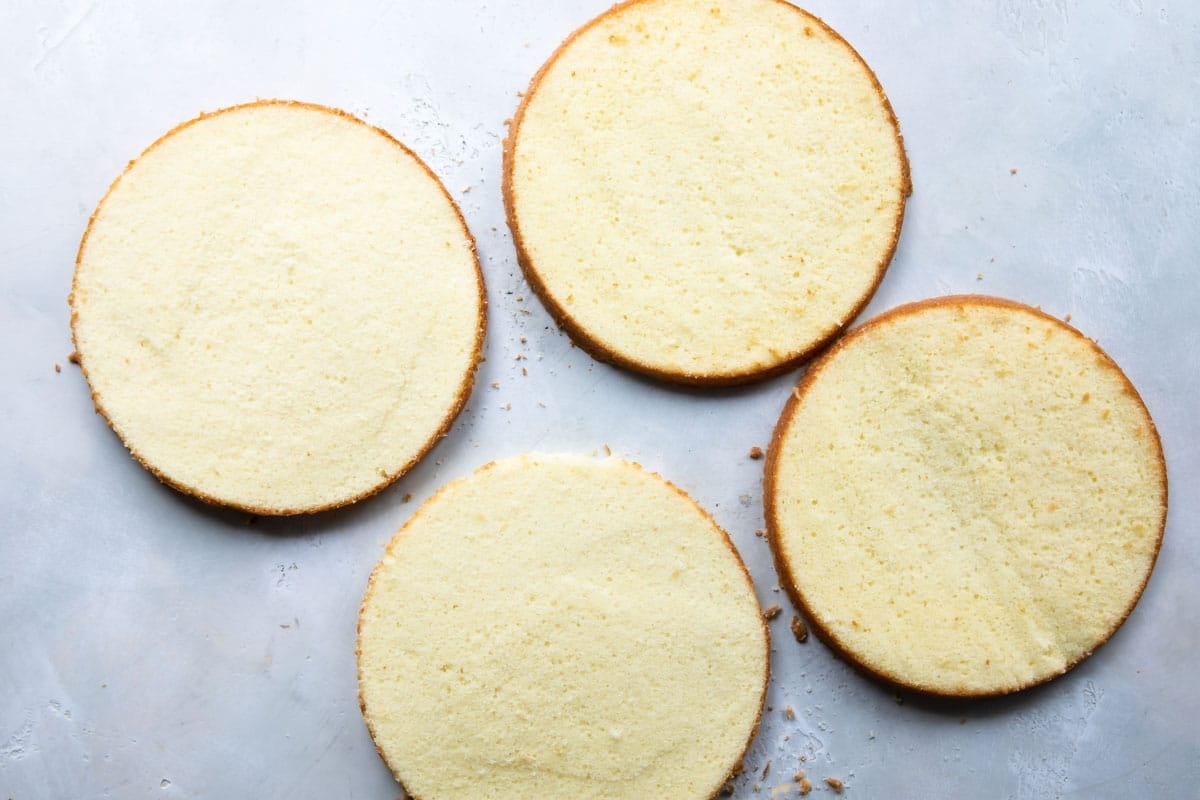
- Slice off any domed tops of your cake to ensure they are flat.
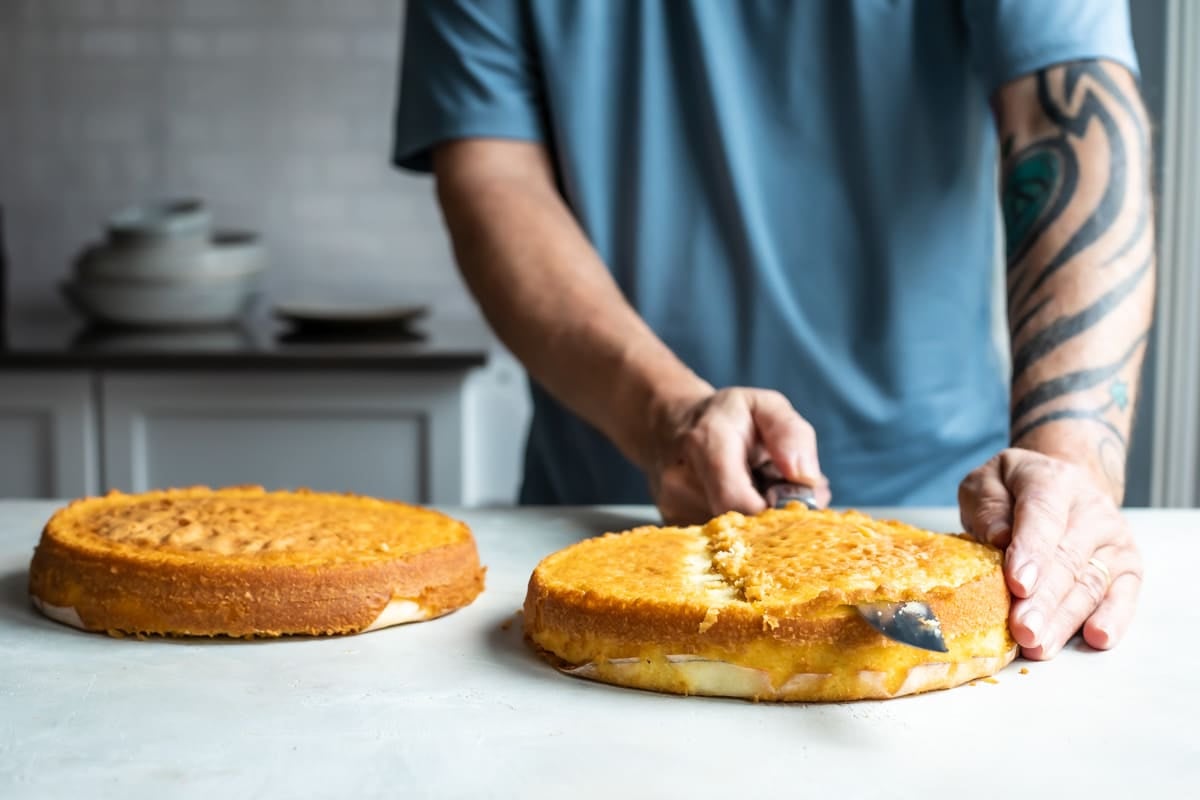
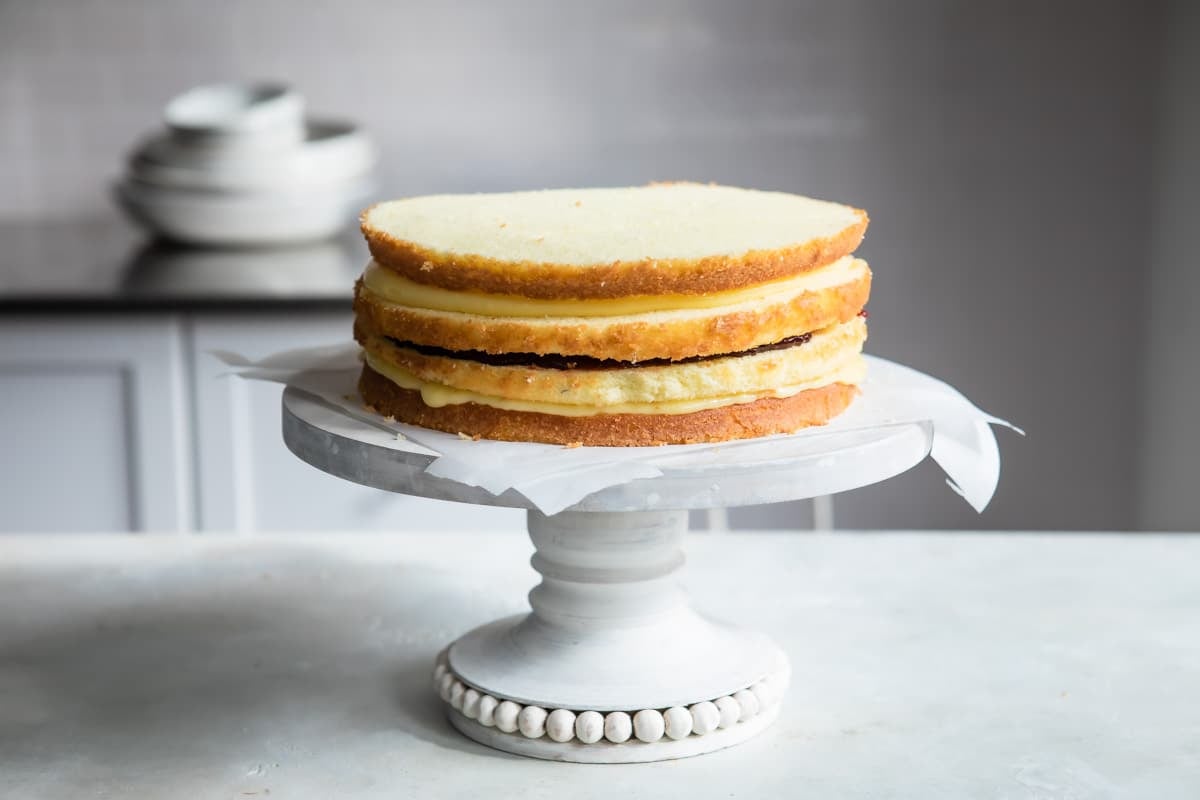
- Cut each cooled cake in half lengthwise so there are four layers of cake total.
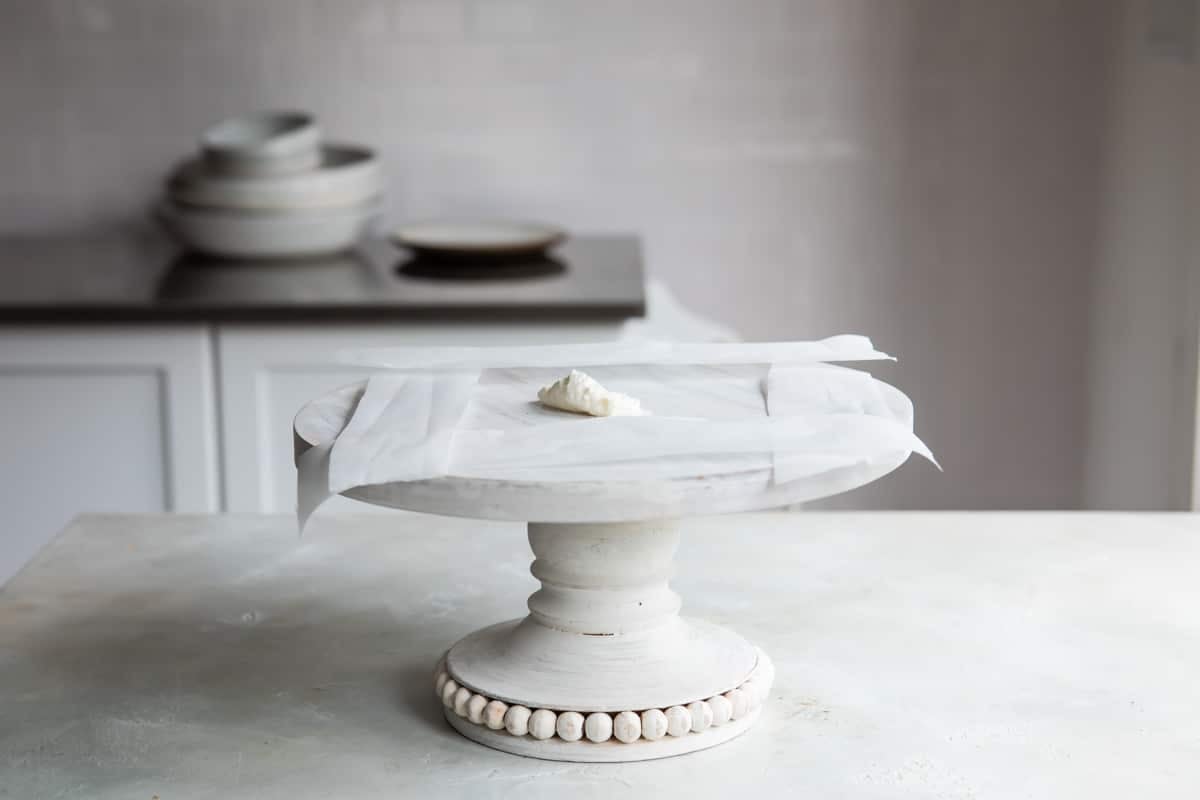
- Cover the edges of a cake platter with strips of parchment paper to help keep it clean. Slide the pieces of parchment out from under the cake once the frosting job is done.
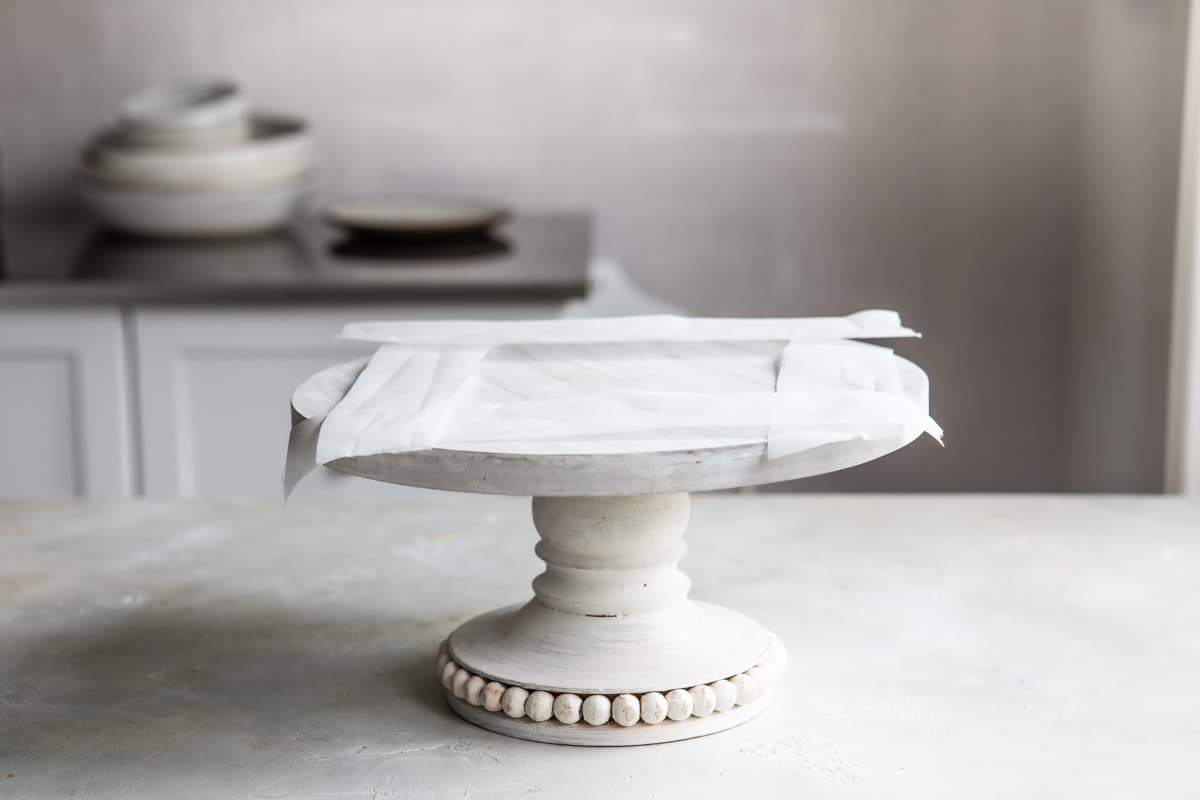
- Dollop a small amount of frosting in the center of the platter to help anchor the bottom of the cake to the platter (so it doesn’t slide around as you frost it).
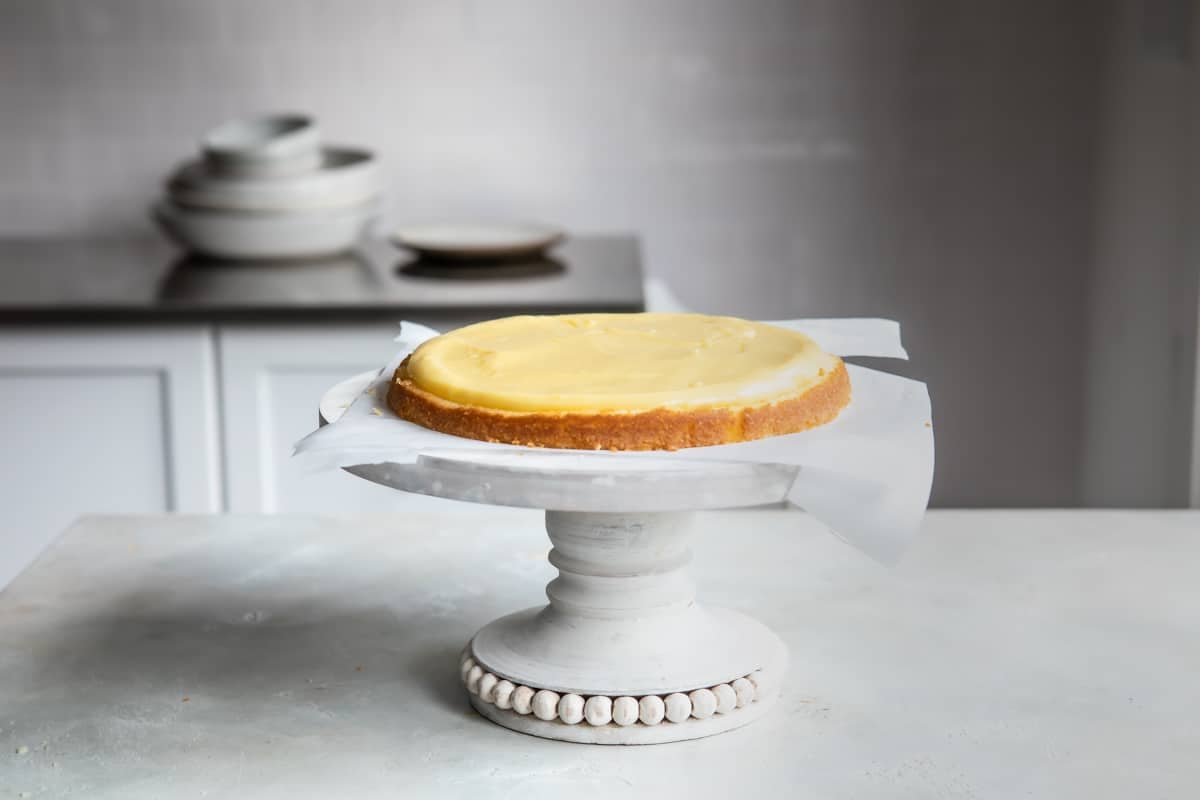
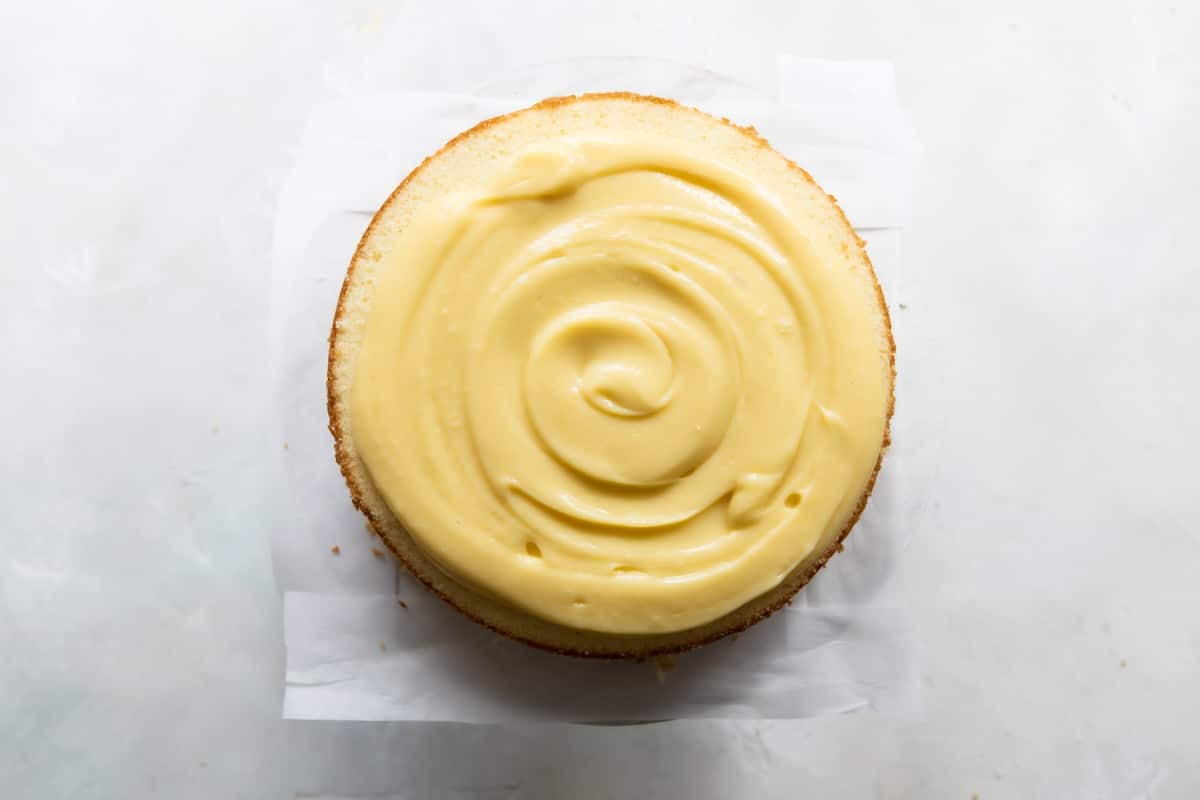
- Add one layer of cake to the serving platter. Add ¾ cup of the pastry cream to the center of the cake and spread in an even layer to the edge.
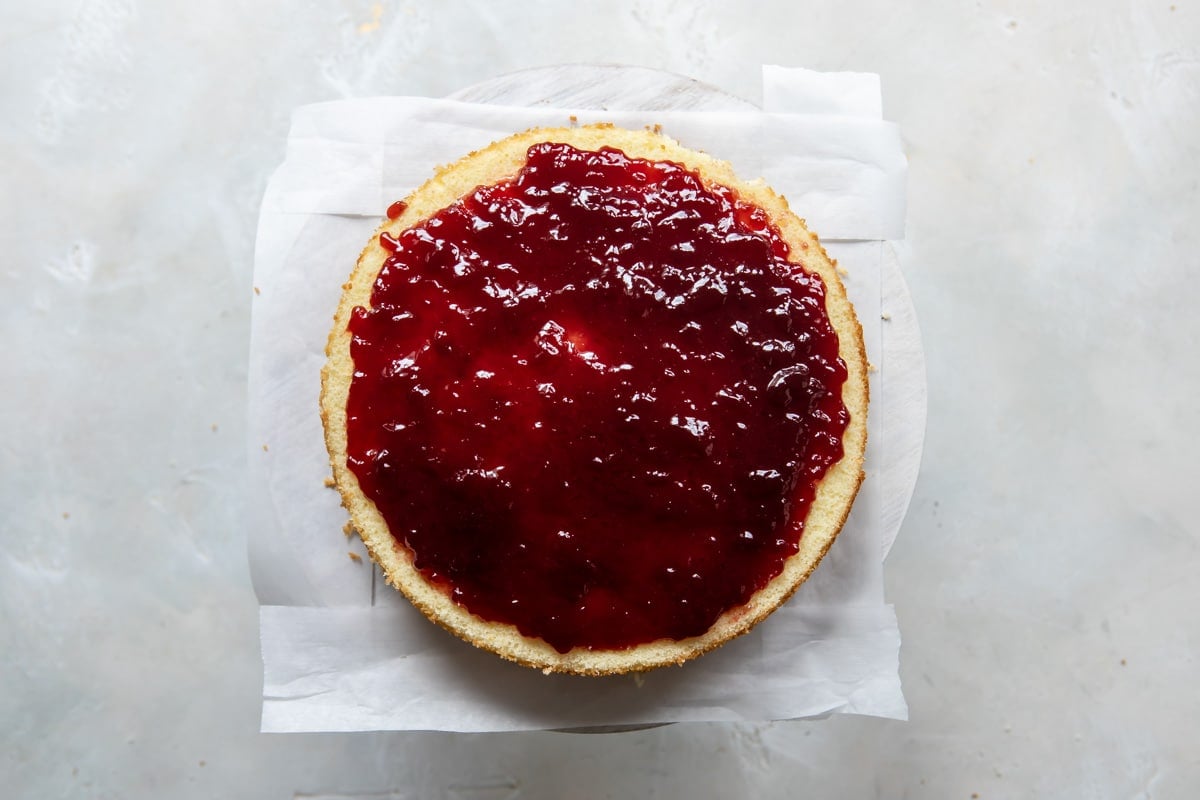
- Align a second layer of cake over the first and top with 1 cup raspberry jam, spreading in an even layer to the edge.
- Add a third layer of cake and top with ¾ cup of pastry cream in the center, spreading in an even layer to the edge.
- Top with the last layer of cake.
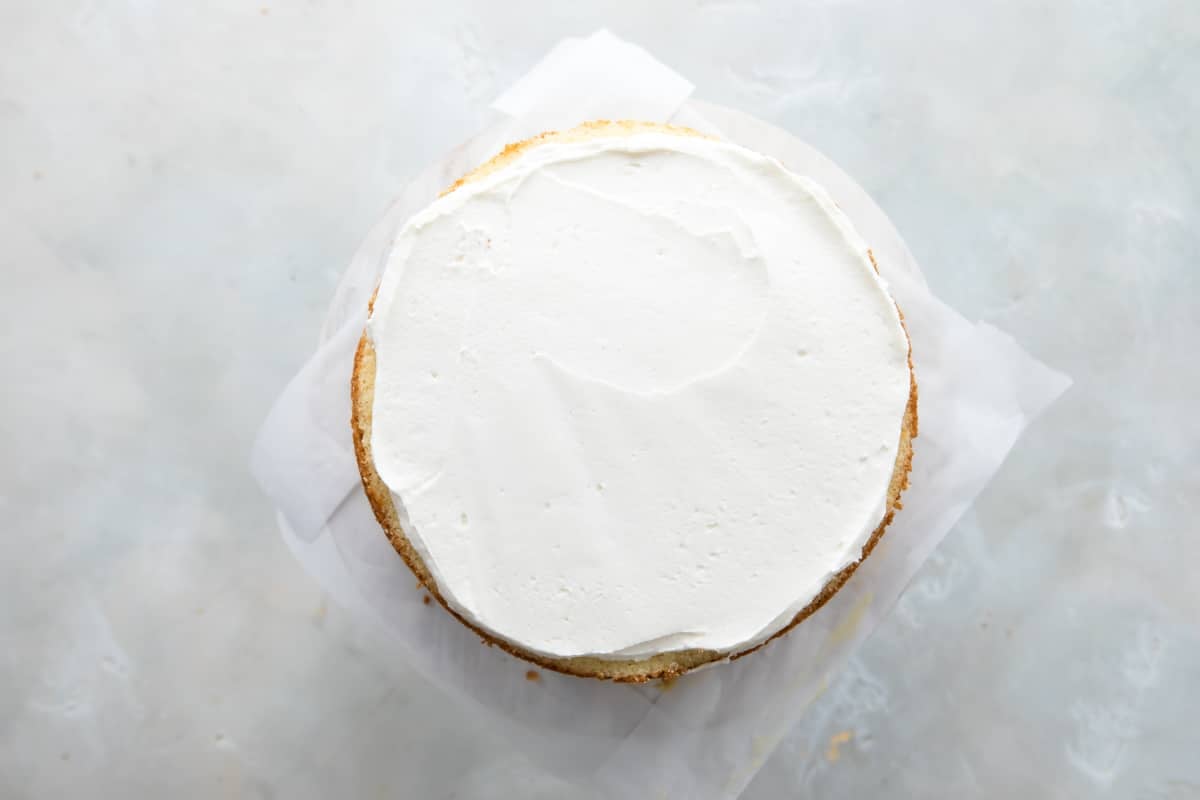
- Brush away any large crumbs, dollop frosting in the center, and spread lightly to the edges.
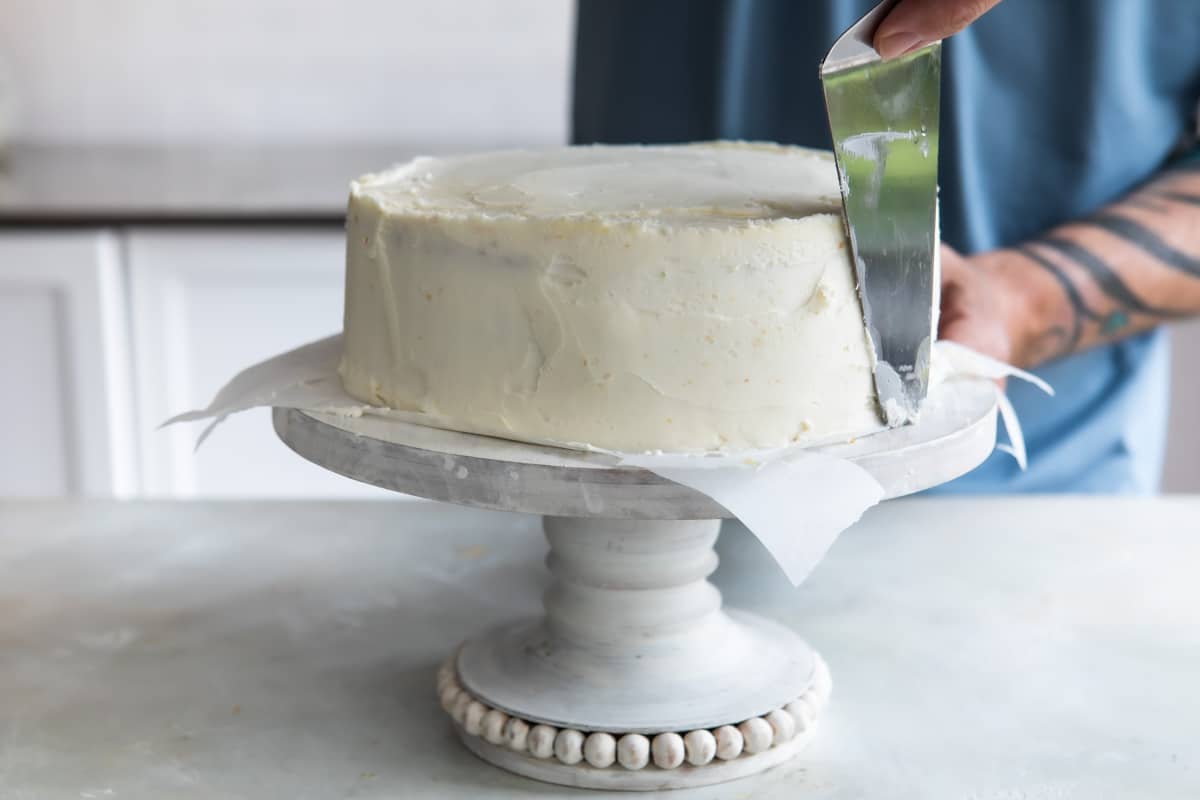
- To frost the sides, gather a few tablespoons of frosting on to the tip of the spatula, then gently spread it onto the side of the cake. Use gentle motions and don’t press too hard or you will end up with crumbs in the frosting. Clean the spatula as needed.
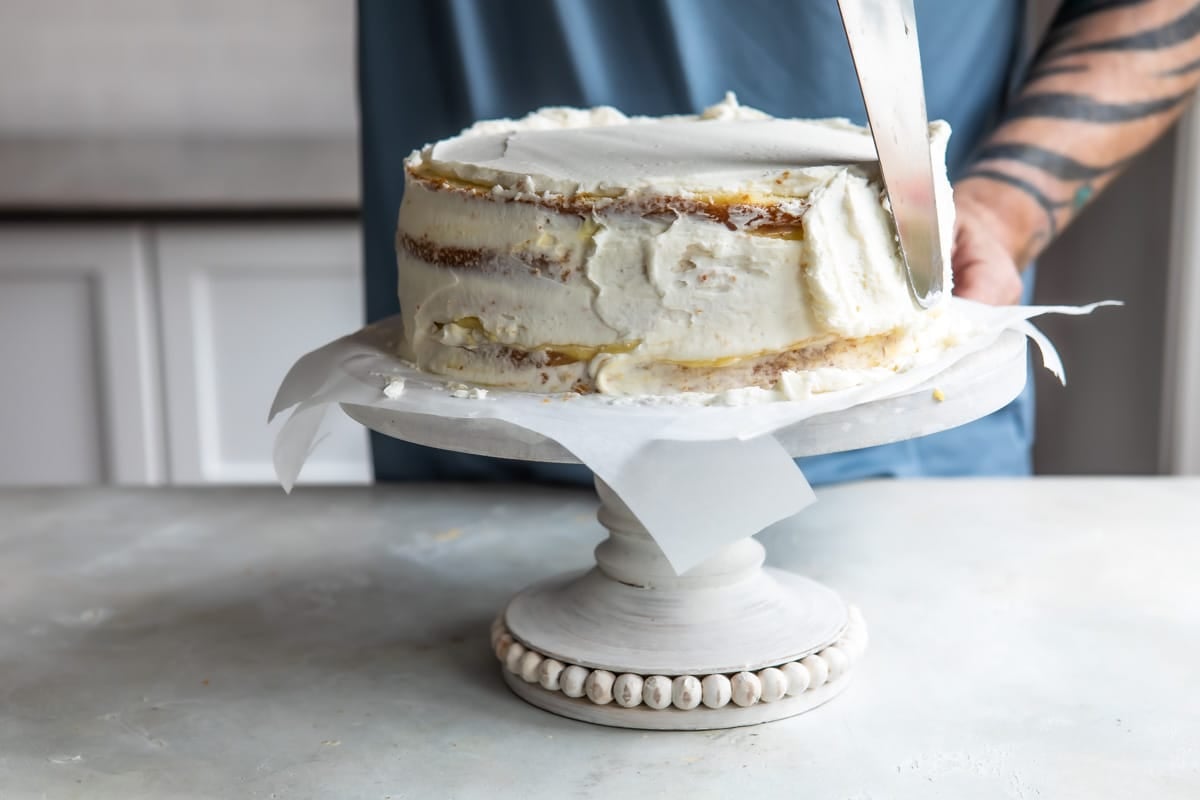
- Gently run the edge of the spatula around the sides to smooth out any bumps and tidy the area where the frosting merges between the sides and the top.
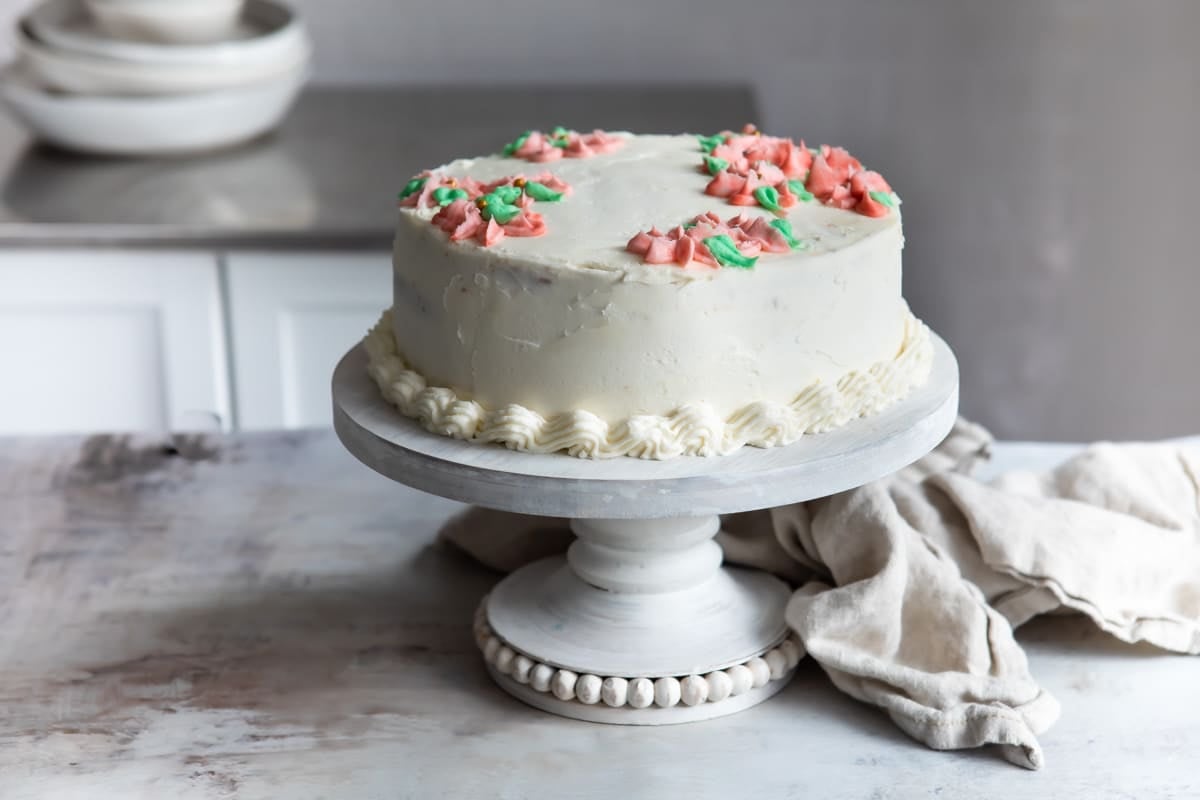
- Decorate the cake as desired with more frosting or some fresh raspberries. Store leftovers in the refrigerator.
Recipe tips and variations
- Yield: This recipes makes 1 spectacular 4-layer Danish Layer Cake. 1 cake serves 12 (or more or less depending on how you slice it).
- Storage: Store leftover cake in the refrigerator for up to 4 days.
- Make ahead: The pastry cream can be made up to 3 days in advance; whisk to recombine before using. The cake layers can be baked in advance. Cool to room temperature, then wrap tightly in a double layer of plastic wrap, and freeze for up to 3 months. Thaw overnight at room temperature. The vanilla buttercream can be made up to a week in advance; store covered in the refrigerator.
- Freezer: The entire assembled, frosted cake can be frozen for up to 3 months. Thaw for 24 hours in the refrigerator.
- Semi-homemade: I grew up with a not-so-homemade version of Danish Layer Cake, and it was the cake I requested every year for my birthday. It’s delicious and much easier than the from-scratch version below. To make my mom’s version:
- Substitute a boxed yellow cake (prepared according to package directions for 2 (8-inch) cakes) for the from-scratch vanilla cake.
- Substitute a (3.4 ounce) box instant vanilla pudding for the pastry cream. Ignore the package directiosn and make the pudding with 2 cups cold milk (chill at least 10 minutes to set).
- Substitute 16 ounces frozen whipped topping, thawed, for the vanilla buttercream frosting.
Recipe FAQs
Yes, it does. Danish Layer Cake is made with pastry cream and raspberry jelly, and those are highly-perishable ingredients that need to be kept chilled.
The entire assembled, frosted Danish Layer Cake can be frozen for up to 3 months. Thaw for 24 hours in the refrigerator.
Order handmade Danish Layer Cakes to be shipped throughout the USA from O&H Bakery in Racine, Wisconsin. They also have the best kringles, too!
More Wisconsin favorites

Entertaining
Friday Night Fish Fry

Cocktail Recipes
Brandy Old Fashioned

Appetizer Recipes
Fried Cheese Curds

Entertaining
Midwest Charcuterie Board
Join Us
Danish Layer Cake (Dansk Lagekage)
Equipment
- 2 8-inch cake pans (see note 1)
Ingredients
For the pastry cream:
- 2 cups milk
- 1 cup granulated sugar
- 6 egg yolks
- 1/4 cup cornstarch
- 1/4 teaspoon salt
- 1 teaspoon vanilla extract
For the yellow cake:
- 1/2 cup whole milk at room temperature (see note 2)
- 4 eggs at room temperature
- 2 teaspoons vanilla extract
- 1 3/4 cups cake flour (7 ounces)
- 1 1/2 cups granulated sugar (10 ½ ounces)
- 2 teaspoons baking powder
- 3/4 teaspoon Salt
- 1 cup unsalted butter cut into tablespoons and softened (2 sticks)
For the buttercream frosting:
- 1 cup butter softened (2 sticks)
- 4 to 5 cups powdered sugar
- 2 teaspoons vanilla extract
- 1/4 cup heavy cream
- Pinch Salt optional
To assemble the cake:
- 1 small jar seedless raspberry jam (see note 3)
- raspberries for garnish optional
Instructions
To make the pastry cream:
- In a medium non-aluminum saucepan over medium heat, warm milk until tiny bubbles appear on the surface, about 6 to 8 minutes (about 180 degrees Fahrenheit/82 degrees Celsius).
- Meanwhile, In a large bowl, whisk together egg yolks and sugar. Whisk in cornstarch and salt.
- While whisking constantly, pour in half of the hot milk. Whisk in remaining hot milk and return to saucepan.
- Cook over medium heat, whisking constantly, until the mixture thickens to a firm consistency, about 5 to 8 minutes. Whisk in vanilla. Scrape in to a bowl.
- Cover with plastic wrap, pressing it directly on to the surface of the pastry cream. Refrigerate until chilled, about 2 to 3 hours. (Note: You will have just over 2 cups of pastry cream and you only need about 1 ½ cups for this recipe.)
To make the cake:
- Preheat oven to 350 degrees. Grease and flour 2 (8-inch) round cake pans, then line parchment paper. In a small bowl, whisk together milk, eggs, and vanilla. Set aside.
- In the bowl of a stand mixer fit with the whisk attachment, beat together flour, sugar, baking powder, and salt.
- With the mixer on medium-low speed, beat the butter in to the flour mixture one piece at a time. Continue beating until the mixture resembles moist crumbs, 1 to 3 minutes total.
- Add the milk mixture to the mixer and beat until light and fluffy, 1 to 3 minutes longer. Stir by hand with a rubber spatula to make sure the batter is fully combined.
- Divide the batter evenly between both pans, gently tapping the pans on the counter to settle the batter. Bake until a toothpick inserted in the center of the cake comes out dry with a few crumbs attached, 20 to 25 minutes. Rotate the pans halfway through baking time.
- Cool the cakes in the pans for 10 minutes. Run a small sharp knife around the inside of each pan to loosen, then flip the cakes on to a wire rack. Peel off the parchment paper, then flip the cakes right side up to cool completely, about 2 hours.
To make the frosting:
- In a stand mixer fit with the paddle attachment, cream butter until pale and fluffy, about 3 minutes.
- Reduce mixer speed to low. Add 4 cups powdered sugar, cream, vanilla, and salt (if using). Continue mixing 2 to 3 minutes longer. If the frosting seems too soft, add the remaining powdered sugar 2 tablespoons at a time.
- Cover and refrigerate the frosting until assembling the cake, up to 1 week in advance.
To assemble the cake:
- Slice off any domed tops of your cake to ensure they are flat. Cut each cooled cake in half lengthwise so there are four layers of cake total.
- Cover the edges of a cake platter with strips of parchment paper to help keep it clean. Slide the pieces of parchment out from under the cake once the frosting job is done.
- Dollop a small amount of frosting in the center of the platter to help anchor the bottom of the cake to the platter (so it doesn't slide around as you frost it).
- Add one layer of cake to the serving platter. Add ¾ cup of the pastry cream to the center of the cake and spread in an even layer to the edge. Align a second layer of cake over the first and top with 1 cup raspberry jam, spreading in an even layer to the edge.
- Add a third layer of cake and top with ¾ cup of pastry cream in the center, spreading in an even layer to the edge. Top with the last layer of cake. Brush away any large crumbs, dollop frosting in the center, and spread lightly to the edges.
- To frost the sides, gather a few tablespoons of frosting on to the tip of the spatula, then gently spread it onto the side of the cake. Use gentle motions and don't press too hard or you will end up with crumbs in the frosting. Clean the spatula as needed.
- Gently run the edge of the spatula around the sides to smooth out any bumps and tidy the area where the frosting merges between the sides and the top.
- Decorate the cake as desired with more frosting or some fresh raspberries. Store leftovers in the refrigerator.
Recipe Video
Notes
- 8-inch cake pans: Do not substitute 9-inch cake pans.
- Whole milk: Do not substitute low-fat milk for the whole milk in the vanilla cake.
- Seedless raspberry jam: If you cannot track this down, raspberry jam with seeds, or another seedless jam, may be substituted. Strawberry seedless jam tastes great in this cake.
- Yield: This recipes makes 1 spectacular 4-layer Danish Layer Cake. 1 cake serves 12 (or more or less depending on how you slice it).
- Storage: Store leftover cake in the refrigerator for up to 4 days.
- Make ahead: The pastry cream can be made up to 3 days in advance; whisk to recombine before using. The cake layers can be baked in advance. Cool to room temperature, then wrap tightly in a double layer of plastic wrap, and freeze for up to 3 months. Thaw overnight at room temperature. The vanilla buttercream can be made up to a week in advance; store covered in the refrigerator.
- Freezer: The entire assembled, frosted cake can be frozen for up to 3 months. Thaw for 24 hours in the refrigerator.
Started using this recipe (or the original version posted) as our go-to special occasion cake maybe 4 or more years ago when our daughter was asking for a vanilla and raspberry cake for her birthday. We have now made many different versions of it using different jams and puddings and it is always fantastic. This year (for her 8th birthday) our daughter requested caramel between the layers and chocolate frosting so we are doing the yellow cake and pastry cream with caramel instead of jam and a chocolate frosting. Thanks for such a lovely, versatile and accessible recipe. We love it!
Hi Nat, thank you so much for sharing your comment! I’m so excited to hear about the special version you’re making for your daughter’s 8th birthday, sounds delicious. I hope your daughter has an amazing 8th birthday! – Meggan
A very nice cake indeed – but much too much sugar in the assembled recipe. I reduced the sugar in the pastry cream to 2/3 cup – could have gone to 1/2 cup but I haven’t made pastry cream before and didn’t want to risk failure. The mixing butter into dry ingredients method was new to me – and I think the butter was the right softness, but my layers did not rise as high as those in your photos. Still I was able to slice them in half, so I was happy. Bake time for me was 28 mins and I was surprised they were done – they were still pretty pale on top. I added some lemon juice to the seedless raspberry jam to cut the sweetness and spread a thin layer over the middle 3 layers, with butter cream on 2 of them. We opted for whipped cream over butter cream and decorated with fresh raspberries (and birthday candles). This is a very rich and decadent cake and everyone thoroughly enjoyed it. Thanks for the recipe!
My mom used to make a layer cake with bananas, raspberry jam and whipped cream. I am planning on making this cake for my daughter’s birthday tomorrow and sadly didn’t post my question before the weekend. The method of mixing butter into the flour is new to me and I was wondering if the butter is cold or room temp. I’m guessing not too cold and will go with that. Hopefully it will turn out okay.
Hi Susan, thank you so much for your question. I hope your daughter had a lovely birthday and your cake came out well! The butter should be softened, so close to room temperature. Take care! – Meggan
I am also free Racine… making this for a friends birthday. She’s never heard of this type of cake and she claims to be a cake aficionado . This will blow her mind!
How fun! I hope she loves it, Gayle!
I am seriously giggling like a mad woman right now! Who ARE you people?? 🤣🤣 I was yearning to make a Danish Layer Cake and here I am. And guess what? I bet you already know! I’m from Racine too! Anyways, I trust this recipe and can’t wait to try it!
Hi Nicole, so glad you’re here! I hope you love this cake! – Meggan
Thank you for a wonderful recipe. My sister-in-law gets the Danish Layer Cake from O&H every year for Easter and we all LOVE it (it is an expensive cake, but it is huge too). This year, I tried to bake your recipe for her birthday. It tasted excellent.
I had some difficulty with the cake coming out very dense and pretty flat. I think I overmixed the batter. It was about 85 degrees and I brought everything to around 67 degrees before starting. When adding the butter to the flour (I have never done it that way before. I always creamed the butter and sugar and then added eggs and then flour, etc when baking a cake), it turned crumbly as according to the recipe. I turned away to get the milk mixture and when I looked back, the flour mixture and butter was creamed already (instead of just crumbly). When I added the milk mixture and mixed for a very short time, everything seemed to start melting. So I stopped and put it in the pans as quickly as possible. I will try it again, because it surely tasted fantastic. Thanks again!
I was looking for a recipe for Danish Layer Cake that I thought I would make for the Christmas holidays and came upon your site. It was like going to a class reunion: There were so many people who posted who either currently live, or formerly lived there, or had relatives in Racine, WI, that I just had to throw my hat in the ring! I grew up in Racine, graduated from Horlick HS, worked at S. C. Johnson (Johnson Wax). and lived in the Danish enclave of West Racine (Kringleville) for a while. In the debate as to which Danish bakery is the best, O&H wins hands down every time! And in terms of butter cream vs. whipped cream, it’s whipped cream all day! Now, I’m off to bake your Danish Layer Cake…with whipped cream, of course! (P.S. Danish kringles are oval, not straight, rectangular pastry.)
In regards to the “Danish Layer Cake” I am half Dane, my Dad is 100%. The recipe that came from Denmark on both his Mother’s and Father’s side is a bit different. When you make for a Dane especially those who remember it at Holidays and Special Occasions, this was what the cake was make out of. Bake in two 8 inch round cake pans; often some recipes call for two 9 inch round cake pans. To make this easier let’s go with a good quality white cake mix. Mix according to directions. Let cool as recipe above then turn pans out to release the cakes ( see above) instead of custard like pudding for one of the fillings use Lemon Curd (I make my own but it is sold in most stores). For the raspberry filling yes preserved work great. I cook down my berries and make my own. For the frosting, I make a Lemon Butter Cream cheese frosting ( using juice from a lemon and some rind.
After cake is frosted sprinkle fresh raspberries on top. You can the add finely grated lemon peel.
You can look in the store but this is easy to make take half inch strips of lemon rind don’t get any of the white on them. Mix one table spoon fresh lemon juice and one tablespoon of candy sugar. Basically the thicker sugar. If you will, you can buy that right. In the baking aisle it looks like sea salt but it’s not and mix those all together. Put parchment on a baking sheet. Arrange your lemon peels on the parchment space them so they’re not touching and put them in a 200° oven for 1 hour, then turn the oven off and leave them overnight. You will then have candy lemon peel and they are quite delicious. You can put that on top of the cake with the raspberries instead of the grated lemon peel. This is all. Just a suggestion but from a dane that has had many Danish dishes that came from Denmark. This is how they truly love it in Denmark. ( I have actually given away a few of the old family Danish secrets so if you use them think of my dad who’s going to be 93 years old and doing great. Thank you)
In preparation for my birthday in May, my six year old son asked me what kind of cake is my favorite. I told him that my favorite cake is a Danish layer. I am originally from Racine, Wisconsin, and I have fond memories of those O&H Danish layer cakes! I looked for a recipe, and yours is the first I saw. I was so pleased to see your reference to Racine. After living in many states, we have settled in Chicago, Illinois, so we are close enough to get an O&H cake, but I have never made my own, and I think it’s time! This year, I’ll have a homemade Danish layer birthday cake!
I am gonna combine your recipe with one I found in The art of Danish Cooking given to me by my mother in law from Saeby Denmark. I’m actually making it for her birthday this week. I’m keeping my fingers crossed as I am not the best baker.